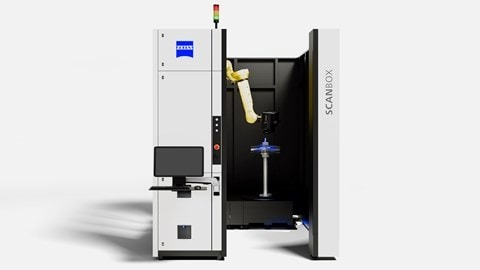
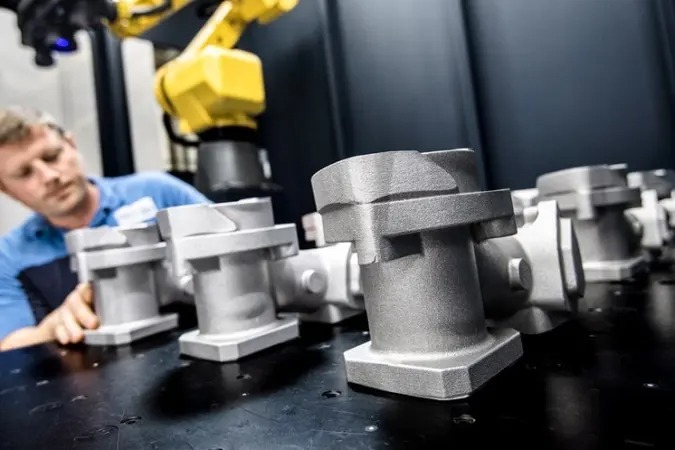
ZEISS Industrial Quality Solutions has expanded its range of optical 3D measuring machines with the new model series ZEISS ScanBox Series 5. In the new series, the proven technological concept of automated ZEISS ScanBox systems is complemented by attractive improvements such as an optimized robot module and a rotation table with a load capacity of up to two tons.
The ATOS 5 high-speed 3D sensor allows complex parts made of different materials such as plastic, metal or cast iron to be digitized and inspected in the shortest possible time. With each measurement, the optical sensor captures the entire surface geometry as well as hole patterns and other characteristics of the part. ZEISS ScanBox Series 5 provides full-field 3D measurement coordinates that can be compared against the CAD model and used for reporting. Deviations in terms of Geometric Dimensioning and Tolerancing as well as trimming and hole positions are visualized in the GOM Inspect Pro software. Programming and controlling the measuring sequences is done via the virtual measuring room (VMR).

ZEISS ScanBox Series 5 was especially designed and developed for series measurements in production environments. The robust housing and sensor design as well as the compensation for temperature fluctuations enable smooth operation even in harsh environments such as foundries or the forging industry. Comprising three variants, the new model series offers a high degree of flexibility and suits different application requirements: While ZEISS ScanBox 5110 is ideal for inspecting smaller parts up to one meter, such as turbine blades, the 5120 model allows for automated quality control of larger parts up to two meters, such as interior components. ZEISS ScanBox 5130 can be used for measuring hang-on parts or tools with a diameter of maximum three meters.
Modular Concept Adapts To Changing Customer Needs
The new ZEISS ScanBox Series 5 models can be configured in different ways based on a modular principle: Since the base components control tower, rotation table and robot module are identical in construction, the layout of the measuring room can be easily expanded at any time.
In addition, the entrance of the 5110 and 5120 models can be equipped with either a door or a safety light curtain. For optimum access, especially for larger test components such as hang-on parts, the 5130 model is always supplied with a safety light curtain. Furthermore, the ZEISS ScanBox 5120 and 5130 models can be supplemented by a pallet loading system. Positioning pins are used to load the pallets quickly and reproducibly, allowing users to increase their throughput.
Ergonomically Optimized Features
The operator station comes with a new variable swivel arm, providing more comfort at the workstation: Incorporated into the control tower, the swivel arm allows the user to individually adjust the table height, making it possible to operate ZEISS ScanBox Series 5 either sitting or standing.
High Automated Throughput

ScanBox systems are characterized by a fully integrated interaction of hardware and software. The GOM Inspect Pro control and measurement planning software in combination with the virtual measuring room (VMR) enables fully automated execution of measurement sequences. After importing the CAD data and the corresponding measurement plan, the software computes the required sensor positions and robot paths.
Due to the Smart Teach functionality, measurement positions in the VMR are automatically updated when the CAD or individual elements change. After completion of the inspection, possible deviations are identified in GOM Inspect Pro and can be displayed in a report with images, tables, diagrams, texts and graphics.
The ZEISS ScanBox Series 5 is developed for serial measurements and can be installed directly in the production environment. Measuring procedures are automated and the reproducibility of 3D measuring data of identical parts is ensured. The robot is fully controlled by the software and successively moves along the measurement positions. During operation, workers can easily operate the system.
For more information: www.zeiss/metrology
Tags: 3d vina, hiệu chuẩn, hiệu chuẩn thiết bị, máy đo 2d, máy đo 3d, máy đo cmm, sửa máy đo 2d, sửa máy đo 3d, sửa máy đo cmm, ZEISS Launches ScanBox Series 5
