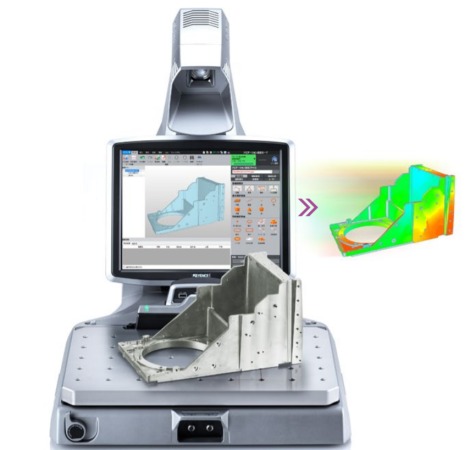
Keyence has announced the release of an update to its XM series of manual coordinate measuring machines (CMM). The updated XM-200 CMM includes a new handy probe with with three rows of LED markers, at three stepped height differences, offering improved stability and achieving a higher measuring accuracy.
The new handy probe is equipped with an ergonomic designed grip, camera, status confirmation LED and is manufactured from oil-resistant PBT resin. The measuring system adopts high-precision technology that captures near-field light emitted by the 12 markers by an ultra-robust camera. Using the coordinate data from each marker, the machine is able to determine the position and orientation of the probe in space. The increased number of markers (7 on previous model) allows the probe to measure with greater dexterity allowing the measurement of feature points from any probe angle.
System accuracy is quoted as 10+L/100 µm with a 3 µm repeatability and offers a measuring volume of 600mm x 300mm x 200mm.
With the original XM Series of bench-top CMM, with hand-held probe, Keyence brought a new concept to manual coordinate metrology. For repetitive inspections the user simply touches the part with the probe stylus while following the augmented reality guidance on the system screen.
 The XM-200 can measure complex shapes and geometric features with a simple software concept that allows anyone to start measuring immediately. The camera image projected by the integral camera, mounted on the tip of the probe, can be captured and used by the software to guide the user on subsequent measurements. The composite image displays measurement location, element name, and measurement result, which are simultaneously displayed allowing even those new to CMM to intuitively understand where they are measuring.
A temperature compensation function allows measurements on the production floor in less that perfect temperature environments.
The optional CAD comparison software module allows measurements to be made directly against nominal CAD data with deviations displayed for comparative measurement. Free-form surfaces can be captured, compared or exported by simply tracing the probe style over the part surface with geometric tolerance of 3D contours also reported.
For more information: www.keyence.com
Tags: 3d vina, hiệu chuẩn, hiệu chuẩn thiết bị, máy đo 2d, máy đo 3d, máy đo cmm, sửa máy đo 2d, sửa máy đo 3d, sửa máy đo cmm, Updated Manual CMM Released
