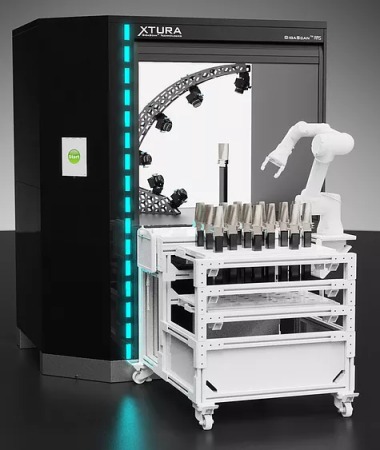
Manufacturer of automated industrial photogrammetric solutions, XTURA, has recently introduced its GigaScan targetless photogrammetry solutions for 3D surface metrology and individual part feature inspections.
XTURA has developed its technology with the intent to create highly flexible 3D scanning technology based on photogrammetry, not only offering improved accuracy when compared to other metrology solutions, but also including all of the advantages targetless photogrammetry can provide.
 “XTURA generates highly accurate automated measurements from photographs that precisely calculates the geometry of an object. Photography is the projection of a 3D scene onto a 2D plane which results in the loss of depth information. The goal at XTURA is to reverse this process” comments Patrik Folkesson – XTURA Chief Technology Officer.
Central to the principles of photogrammetry is a requirement to match corresponding features in multiple images of an object, from different viewpoints. Multiple images of the object must therefore be captured with sufficient overlap to view those corresponding features multiple times. If common feature points are not found or are incorrectly matched, inaccuracy will result. Some industrial photogrammetric solutions use targets placed on the subject surface which overcomes this challenge. This approach provides high measurement accuracy, but only captures the ‘targets’, it does not capture any information from the actual subject surface. An additional surface capture technique is required, such as projected light scanning, where the target-based photogrammetry points are used as a high accuracy ‘framework’ onto which surface scan ‘patches’ can be registered.
 “With the our developments in imaging technology, and readily available computational power, more advanced targetless photogrammetry techniques can be performed. XTURA’s GigaScan technology specifically leverages the inherent ‘texture’ within the object’s actual surface. This means that many more common feature points can be found and these represent the object’s actual surface, rather than artificial targets applied to the surface. The result is a high-resolution, high-accuracy point cloud” further comments Folkesson.
The XTURA GigaScan delivers on this targetless photogrammetry technology enabling users to take the next step in production based metrology.
The core components of GigaScan™ powered solution are:
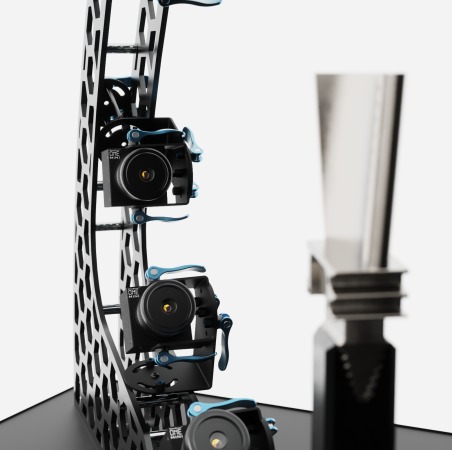
Imaging Sensor: Canon industrial grade digital camera, custom calibrated and optimized robust use with XTURA photogrammetry algorithms. The imaging sensors are managed via the XTURA multiple GPU system controller ensuring images are captured with the correct timing for the inspection process and optimized for rapid 3D photogrammetry reconstruction.
 GigaScan 3D Software: The software ‘engine’ processes image data for 3D reconstruction. The heart of the system are the XTURA developed and optimized algorithms delivering both 3D accuracy and processing efficiency.
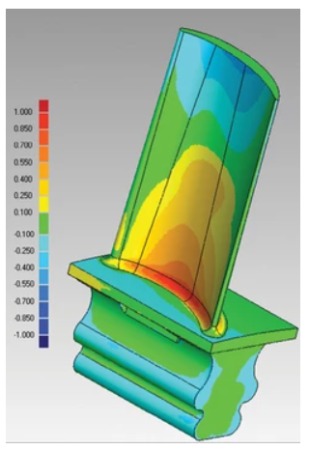
GigaScan powered solutions are engineering to deliver automated, repetitive surface geometry and feature inspection tasks. Systems can be engineering with a fixed array of sensors providing a pass/fail output for high volume production applications or a single camera integrated integrated with a collaborative robot providing detailed metrology analysis.
Unlike other metrology technologies which have a strictly limited accuracy, GigaScan also offers the opportunity for system accuracy selection whereby the system accuracy provided is largely a function of system design until reaching low micron levels. Systems can be tuned by increasing input imaging resolution and coverage to meet the required output precision and inspection speed.
GigaScan Powered Inspection Solutions Highlights:
– Targetless photogrammetry with no need to apply targets to part surface.
– No surface preparation since the approach uses the inherent texture in the material, structure or surface finish of the part.
– No localisation needed. Many current measurement techniques require highly accurate positioning or tracking of the sensor in order to create a global system alignment. GigaScan technology only requires the sensors to be orientated to view the object, with no requirement for camera position to be accurately known.
– Targetless photogrammetry does not require system complexity at the capture phase of the process providing robustness and environmental independence.
For more information: www.xtura.se
Tags: 3d vina, hiệu chuẩn, hiệu chuẩn thiết bị, máy đo 2d, máy đo 3d, máy đo cmm, sửa máy đo 2d, sửa máy đo 3d, sửa máy đo cmm, Targetless Photogrammetry Automates Production Measurement
