Quality assurance is often a source of pain for decision-makers in manufacturing companies – a necessary evil that generates high costs without helping to improve the speed of production. This was an issue that Helmut Häckl, managing director of Schabmüller Automobiltechnik, was all too familiar with. Häckl’s company machines the cylinder head covers for all V6 gasoline engine vehicles worldwide of a southern German automotive group. And they compete with suppliers in low-wage countries. Under such conditions, how does a manufacturer ensure high levels of quality in a manner which is also cost-effective? For Schabmüller, the answer came in the form of an automated measuring solution which, in close collaboration with ZEISS, was integrated directly into their production line.

Each day, Schabmüller inspects, cuts, measures and prepares for delivery roughly 2,600 components after arrival. “This is easily our largest production project, and a very challenging one as well,” says Häckl. “Global competition among automotive suppliers is fierce, and cost efficiency is an important factor.” At the same time, the components are subject to stringent quality requirements. To meet this challenge, Schabmüller uses two ZEISS production measuring machines which, together with an automated loading table, inspect the quality of the manufactured parts. Their setup, in operation since 2017, is special: the measuring machines were integrated directly into the automated production line in collaboration with ZEISS. And the investment quickly paid off. “We haven’t had a single complaint since we started doing quality assurance with the ZEISS inline measuring technology,” reports Häckl.
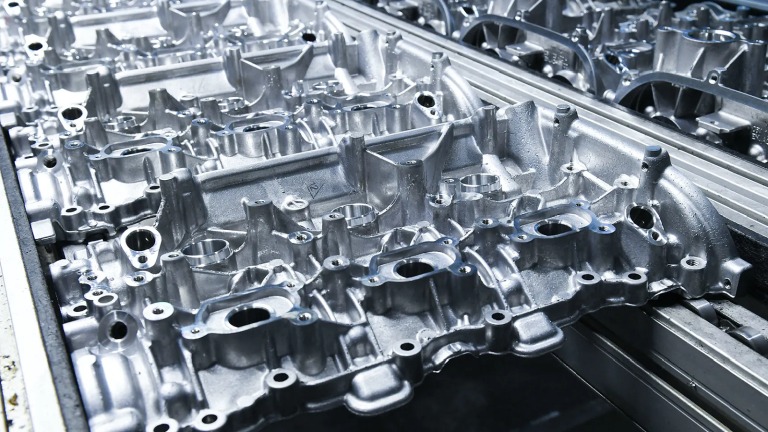
The required efficiency in machining is ensured by a nearly fully automated production line: the incoming blanks are loaded manually into the first station, and the rest of the machining process is then performed almost entirely automatically across a total of 96 processing stations. The key process is that of cutting the blanks to make high-precision fitting drill holes and sealing surfaces. Robotic arms grab the blanks from the assembly line and place them in the clamping machines. What comes out at the end is a cleanly machined part. Normally.
Automated Production Line with Integrated Quality Assurance

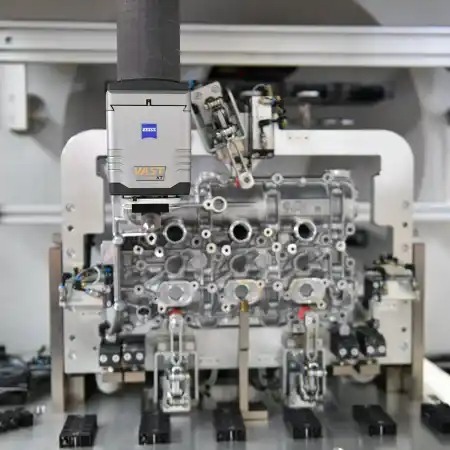
To reliably detect exceptions to this rule, a station is placed halfway down the production line with two integrated ZEISS GageMax machines, each equipped with a fully-automatic loading system. The station hence works as a fully-automated part of the production line: a robotic arm grabs the incoming cylinder head cover and holds it up to remove any residual metal chips with compressed air. The arm places the cover on a ZEISS custom-made clamping device on the sliding table. The probes in the ZEISS ProMax-G lateral probe rack then scan the relevant characteristics of the component in accordance with a defined program. In this way, the station is able to quickly scan and analyze 35 highly critical characteristics. A coding system tells the robot at that measuring station whether to select a workpiece for inspection or to send it to the next processing station. This system ensures that inspections are always evenly distributed across workpieces at all 96 stations, making it possible at all times to trace errors to specific production machines and processing stations.
High Measurement Speed and Durability
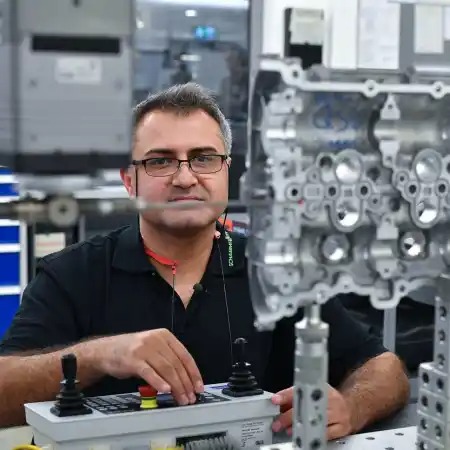
Facility operator Frederic Kern is extremely satisfied with the solution: “It’s important to me to know with confidence that ‘my’ facility is running smoothly and delivering high levels of quality. This solution gives me instant certainty.” Each of the 96 processing stations within the facility are a potential source of error. A single tool swap can result in deviations which fall outside of the very narrow tolerances. “If this happens, I need to know about it right away,” says Kern, “otherwise we’ll end up producing lots of rejects, which is expensive.”
The automated measuring solution from ZEISS can inspect the products of all processing stations within 16 hours. This is only possible thanks to the two production measuring machines, which are able to load and measure components quickly. “Of course, there are harsh conditions in production – there’s dust, dirt and vibrations, and it’s cold in the winter and hot in the summer,” says Kern. “But the ZEISS devices stand up to these conditions just fine.” Helmut Häckl can attest to this. In 2017 he oversaw the project to introduce the inline coordinate measuring machine. “It was clear to me from the start that we needed an inline solution,” emphasizes Häckl. “And the ZEISS inline solution provides the durability we need in an environment such as this.”
More Time Available for the Metrology Lab

Before the inline solution was introduced, quality assurance was performed by means of performing serial measurements in the measurement lab – a very time-consuming process. Now, metrologist Emre Baysal and his colleagues have enough time to perform in-depth complete measurements, including roughness and contours, on selected components twice a week. “It’s great that the ZEISS solution is able to continuously perform routine inspections in production without the involvement of any workers,” says Baysal. “This saves us a great deal of time and allows us to focus on those tasks which actually need to be performed by a trained metrologist.”
Baysal is also a big fan of the ZEISS CALYPSO software, which Schabmüller uses to manage multiple devices. The company also uses ZEISS PiWeb to visualize quality data. “This is an enormous advantage,” says Baysal, “because it allows us to directly compare measurement results from all devices, and it gives us conclusive information which we can store in our database.” The data stored with ZEISS PiWeb is compressed and displayed in an easy-to-understand manner, with relevant data being visualized for different groups of workers (e.g. machine operators, metrologists, management). This ensures transparency and leads to fast and easy decision-making, allowing production trends to be identified in a timely manner and making defective workpieces a thing of the past. And since the facility’s workers were already familiar with the software environment, there was no need for additional training when the ZEISS inline solution was introduced.
For Herman Häckl, quality assurance has gone from being a source of discomfort to a true competitive edge: “We’re able to ensure quality in our largest production line without having to hire additional personnel,” says Häckl. “This saves costs and enables us to use quality to set ourselves apart from competitors from abroad.” Even the planning and introduction of the system was easy, says Häckl: “Something like this is only possible with close cooperation between skilled partners. ZEISS understands what our needs are, and has the expertise and experience necessary to integrate measuring machines in an automated production line.”
For more information: www.zeiss.com/metrology
Tags: 3d vina, hiệu chuẩn, hiệu chuẩn thiết bị, máy đo 2d, máy đo 3d, máy đo cmm, Staying Competitive with Inline Quality Assurance, sửa máy đo 2d, sửa máy đo 3d, sửa máy đo cmm
