The Coordinate Measuring Machine (CMM) has been around in its current bridge configuration form for over 35 years. While speed and accuracies have improved over the decades the basic footprint has remained unchanged. The bridge CMM is something of a ‘space hog’ with its ‘X-Y’ measuring volume being only some 25% of its total footprint on a typical 7.10.7 (700mm x 1000mm x 700mm) size of CMM. The traditional CMM controller and supporting desk add further to the bridge CMM overall footprint.
With the trend of positioning measurement ever closer to production processes the need to relocate CMM measurement out of the measurement laboratory is gathering pace. Floor space is always a premium on the manufacturing floor and thus the traditional bridge CMM footprint can increasingly representing challenges.
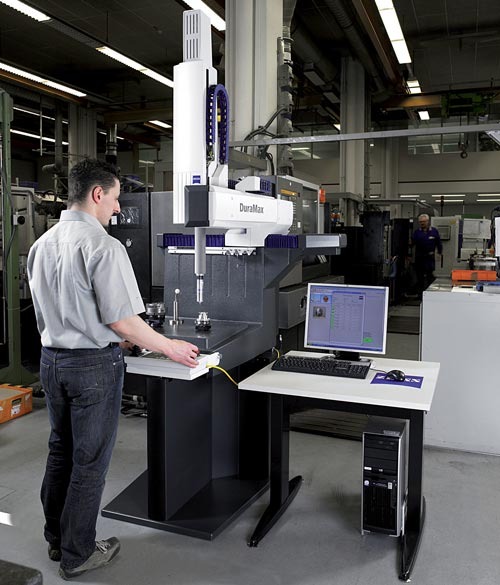 With the current trend for the CMM to be positioned on the production floor to pace production we have witnessed, over past years, an increasing number of ‘shop-friendly’ CMMs being launched. These have almost all been of the Cantilever structure style, a configuration previously popular in the 1980’s, which all but disappeared as the bridge configuration secured market domination.
The Cantilever structure, such as the Zeiss Duramax, offers a much improved footprint efficiency with a significantly higher percentage of the occupied floor-space being measuring volume which, together with its open frame, lends itself to automation. Error compensation, perfected by the CMM industry during the 90’s, has now enhanced cantilever CMM accuracy to the equivalency of bridge machine accuracy levels.
More recently we have seen new innovative CMM structure configurations come to market including the delta structure, which first appeared in the 3D printing industry, and the hexapod along with small gantry style configurations.
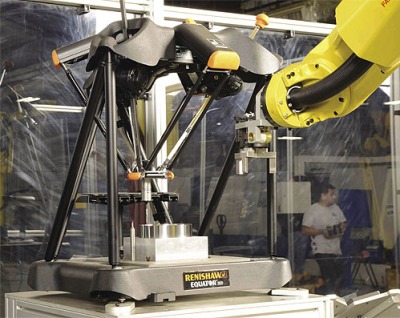 Renishaw has turned CMM principals into a production gauge with its Equator range of machines. The Equator gauging system is an innovative and highly repeatable gauging technology, based on the traditional comparison of production parts to a reference master part. Re-mastering is as swift as measuring a production part and immediately compensates for any change in the thermal conditions of a shop-floor environment. Equator systems can be used in factories with wide temperature variation by simply re-mastering and the system is ‘re-zeroed’, ready for repeatable measurement comparison to the part master.
Equator’s CMM Compare software allows the calibrated absolute accuracy of the traditional CMM to be ‘extended’ onto the shop floor to provide traceability to Equator gauging measurements with any production part being be used as a master part.
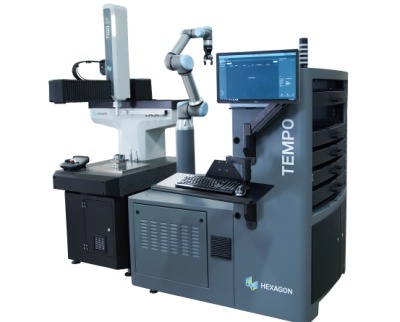 Hexagon’s Manufacturing Intelligence division has launched its TEMPO robotic part loading system for CMMs designed to enable manufacturers to maintain inspection throughput without the need for operator intervention.
TEMPO is compatible with new and existing CMMs for automated part loading, queuing and unloading. Driving workflow efficiency, the system can be set-up to carry out measurements when operators need to work away from the CMM on other tasks or throughout an unmanned night shift. TEMPO is an off-the-shelf solution using a collaborative robot from Universal Robots.
TEMPO is configurable with three to six loading drawers, each with 0.3 square metres of storage space and holding up to 100 kg of parts. The system is quickly installed to avoid downtime and is readily configurable to process parts newly introduced to customer operations.
 Shining a Light on Complex Production Measurements
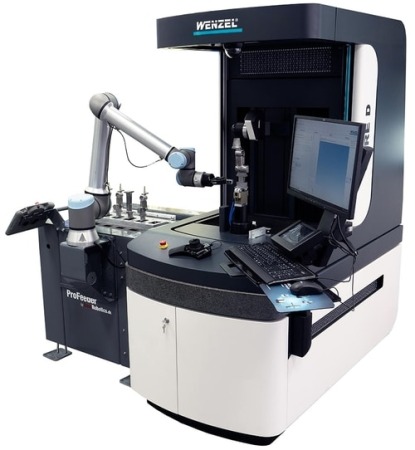
With optical measurement growing at a rapid pace is comes as little surprise that optical technology is finding its way onto CMM structures. Wenzel offers it CORE white light scanning machine and state “In addition to measurements in the measuring room, it is now important to move metrology to the production area close to the processing machines in order to be able to react quickly to deviations.”
The Wenzel CORE measuring machine can be used directly in the production area and measure critical characteristics. It is possible to measure almost all surfaces, whether shot-peened, painted, polished or matt.
Fast and efficient, the Wenzel CORE D can be used where manufacturing takes place, right on the shop floor. Designed to increase speed in the production process, the CORE M offers a highly flexible optical 3D inspection solution for larger components and demanding measurement requirements in global manufacturing.
Non-Cartesian CMM Integrates CNC Machining With Process Control
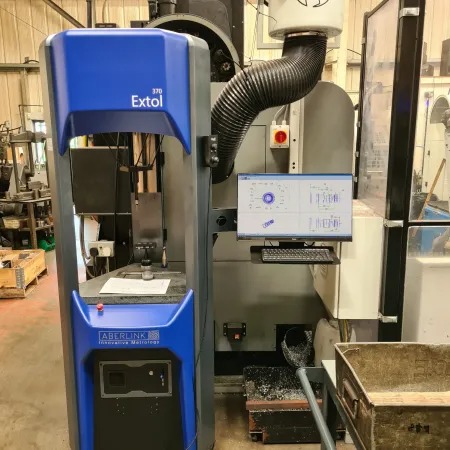 The Aberlink EXTOL Coordinate Measuring Machine is the world’s first CMM to utilize a delta mechanism. Designed for robustness and reliability, the Extol CMM will run around the clock making it ideal whether it is positioned next to a machine tool, in a manufacturing cell, or used in a dedicated inspection area. Five temperature sensors monitoring both the machine and ambient temperature ensure that the Extol is capable of operating in uncontrolled environments and reporting measurements as though they had been taken at 20°C The software will also produce a warning should the temperature change at a rate that is not conducive with reasonable metrology practice.
The Automatic Tool Offset Correction, available in Aberlink’s 3D software, compliments the attributes of the Extol perfectly allowing utilization as part of a fully automated production process in the midst of a manufacturing environment.
The ergonomics of the Extol have also been a significant design factor. It is not only quick and easy to perform one-off inspections, but also has ample access for either batch inspection or to facilitate automatic loading. The largest Extol 520 model offers a measuring volume of 520mm x 520mm x 300mm and small overall footprint allowing the Extol to be positioned exactly where the measurement is needed.
Portable Automated CMM For Shop Floor Inspection
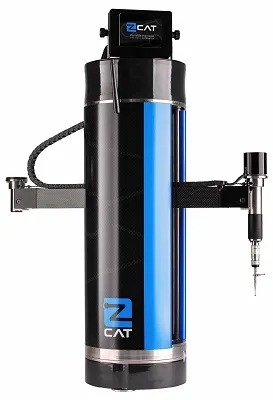 The Fowler zCAT is heralded as the worlds first truly portable CNC CMM and offers a compact self-contained measuring unit that fundamentally differs from traditional CMM design and operation. Invented by Homer Eaton, inventor and pioneer of portable arm CMMs (PCMM), the zCAT portable CMM brings coordinate metrology onto the production floor.
The unique 4 axis CMM configuration provides X, Z linear axis together with a 360 degree rotational base and 360 degree probe rotational axis. On-board PCB provides motion control, error mapping, I++ interface and ControlCAT metrology software. The zCAT provides a unique cylindrical measuring range with diametrical range of 720 mm and 250mm of Z measuring range. Claimed accuracy is the the range of 7-8 Microns with repeatability of 2-3 Microns.
Weighing less than 14 Kg zCAT takes CNC measurement wherever its needed allowing deployment directly to manufacturing process. The measuring system is powered by a built-in 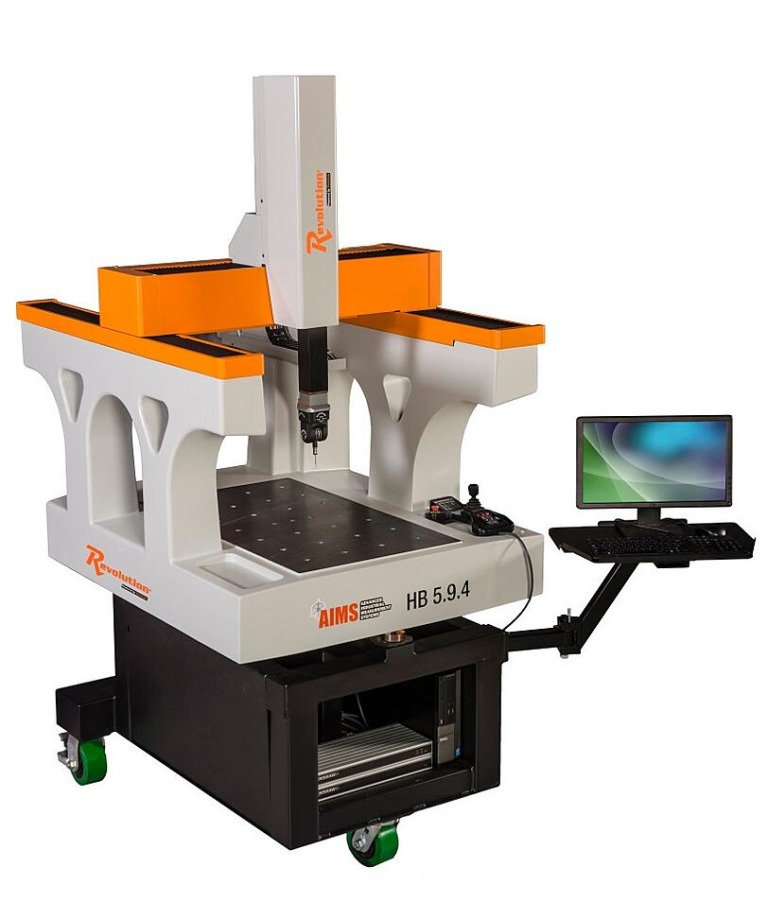 battery providing a remote 4 hour operation between charges.
Robust and Rugged CMM Structure
Another configuration of CMM, that appeared early-on as a shop-floor solution, and in some ways led the trend, for non air-bearing CMMs installed in hostile manufacturing environments, was the ‘half-gantry’ CMM structure. Typically machines offer a one piece polymer casting structure providing a very rugged inspection entity delivering built-in vibration resistance and thermal stability for life on the shop-floor. The Revolution HB (hard bearing) machine from USA manufacturer AIMS offers measuring sizes up to 800mm x 1000mm x 600mm.
Revolution can be equipped with 5 axis sensors including the PH20 from Renishaw providing improved productivity for production measurements.
The Shape of Things To Come
Structure light scanning now dominates the portable hand-held scanning market and has also penetrated the automated production scanning of automotive sheet-metal parts and assemblies. The release by Renishaw of its RFP1 probe, which increases the multisensor capability of the REVO 5 axis CMM sensing system, adds non-contact structured light inspection to CMMs. The RFP1 probe is designed for inspection of freeform surfaces and complex part geometry and rapidly deliveries patches of surface data with a high point density.
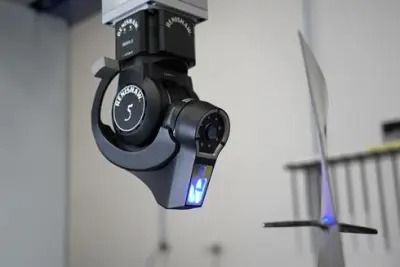 The probe projects a fringe pattern onto the part surface and the probe’s camera captures the variation in fringe pattern to build a high-density point cloud of 3D surface data. The data cloud is then evaluated by 3D metrology software to deliver the inspection results.
The fringe probe does not require reference markers to stitch together data from different part areas, as this is completed automatically by the REVO system. Automatic exposure compensation ensures optimal data results for different materials, surface colors and textures without the need for matt coatings. The RFP1 provides high density data at a high capture rate to deliver highly accurate measurement of surface topology using a CMM.
The CMM is Dead, Long Live The CMM!
The coordinate measuring machine continues to dominate high accuracy dimensional control in manufacturing albeit morphing to adapt to the next generation of smart manufacturing. The CMM remains ‘King’ as the ‘go-to’ solution for high precision dimensional inspection and although its obsolescence has been long predicted the CMM remain ‘alive and well’ and will no doubt continue to morph as manufacturing further transitions in the coming years and new sensing technologies come to market.
Tags: 3d vina, hiệu chuẩn, hiệu chuẩn thiết bị, máy đo 2d, máy đo 3d, máy đo cmm, Shaping The Future Of Coordinate Measuring Machines, sửa máy đo 2d, sửa máy đo 3d, sửa máy đo cmm
