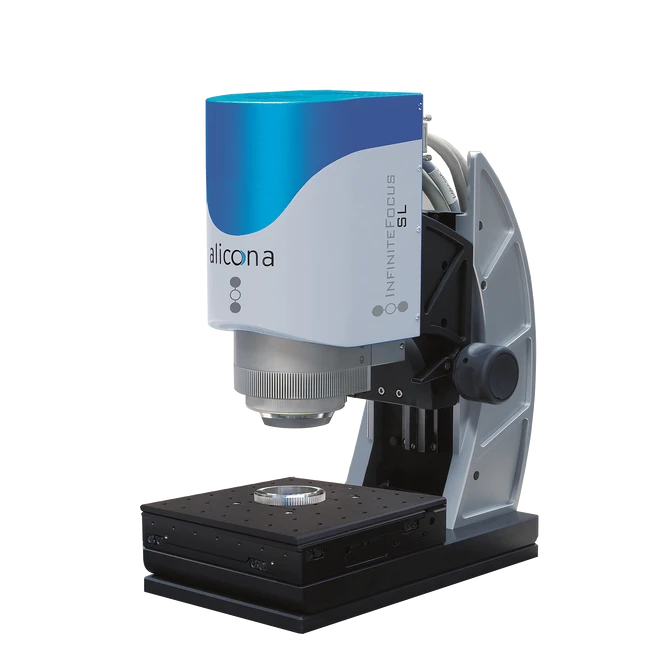
InfiniteFocusSL
Liên hệ
- Vận chuyển giao hàng toàn quốc
- Phương thức thanh toán linh hoạt
- Gọi ngay +84 978.190.642 để mua và đặt hàng nhanh chóng
MÔ TẢ SẢN PHẨM
Simple, traceable & repeatable measurements of microstructured surfaces
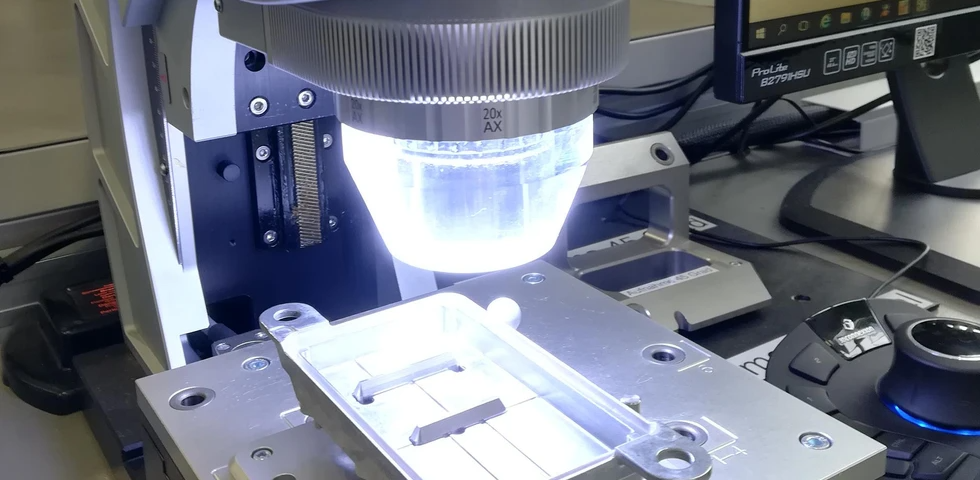
InfiniteFocusSL is a cost-efficient optical 3D measurement system for easy, fast and traceable measurement of shape and finish on micro structured surfaces. Users measure both shape and roughness of components with only one system.
In addition, color images with high contrast and depth of focus are achieved. The long working distance of up to 33mm in combination with its measurement field of 50mm x 50mm allows a wide range of applications. Measurements are achieved in seconds and features, such as a coaxial laser for quick and easy focusing, further increase usability. With an automation interface, InfiniteFocusSL is also applied for fully automatic measurement in production.
Success story: Optical metrology & AI ensure reliable powertrain technologies
For the implementation of a new laser cleaning process, automotive supplier Vitesco Technologies was looking for a measuring device to monitor the performance and quality of laser processing in series production. The Bruker Alicona 3D measurement system offers a new classification software in addition to 3D topography measurement. Based on AI, the software automatically detects OK and not OK surfaces.
Measurement report: Plug connections
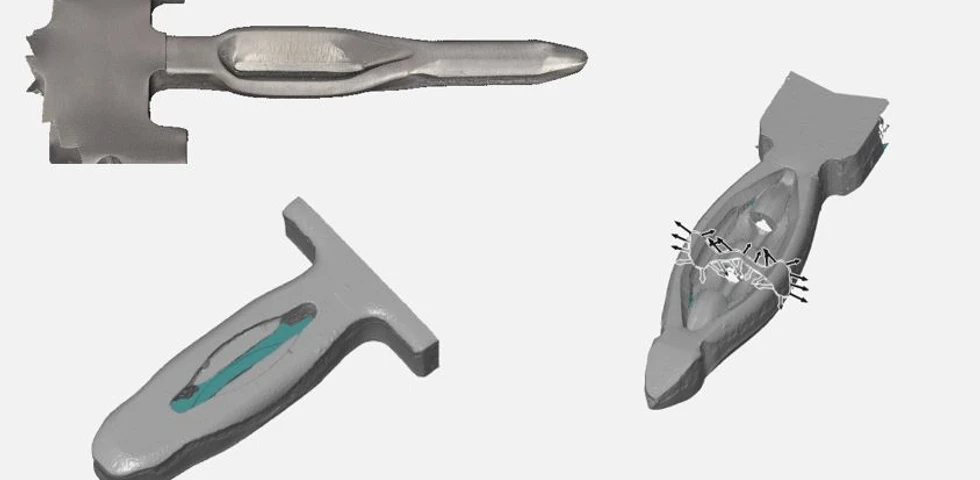
Plug connections of the most diverse types are used in electromechanical components in billions of cases. A high precision and a perfect fit is mandatory for the long lasting use of the components. With InfiniteFocusSL all required parameters of the pins are measured easily and fast. The results are repeatable and user indipendent. Also various pin variants with different surfaces can be measured.
Success story: Measuring the geometry of pins optically in 3D
Frank Uibel, a long-time expert in the field of press-fit technology and active member of the IPC, recommends Bruker Alicona technology as a “fast, simple and accurate measuring tool” for the geometric verification of press-fit zones. We wanted to know why and asked him a few questions.

| Measurement principle | non-contact, optical, three-dimensional, based at Focus-Variation |
| Positioning volume (X x Y x Z) | RL objectives: mot.: 50 mm x 50 mm x 155 mm (Z: 25 mm mot., 130 mm man.) = 387 500 mm³ |
| SXRL/AXRL objectives: mot.: 50 mm x 50 mm x 120 mm (Z: 25 mm mot., 95 mm man.) = 300 000 mm³ |
| Objective name | 10x | 20x | 50x | 2xSX | 4xAX | 5xAX | 10xAX | 20xAX | 50xSX | |||
| Working distance | mm | 17.5 | 16 | 10.1 | 34 | 30 | 34 | 33.5 | 20 | 13 | ||
| Lateral measurement area (X,Y) (X x Y) | mm mm² | 2 4 | 1 1 | 0.4 0.16 | 10 100 | 4.87 23.72 | 3.61 13.03 | 2 4 | 1 1 | 0.4 0.16 | ||
| Vertical resolution | nm | 100 | 50 | 20 | 3500 | 620 | 460 | 130 | 70 | 45 | ||
| Height step accuracy (1 mm) | % | 0.1 | 0.1 | 0.1 | 0.1 | 0.1 | 0.1 | 0.1 | 0.1 | 0.1 | ||
| Max. measurable area | mm² | 2500 | 2500 | 2500 | 2500 | 2500 | 2500 | 2500 | 2500 | 2500 | ||
| Min. measurable roughness (Ra) | µm | 0.3 | 0.15 | 0.08 | n.a. | n.a. | n.a. | 0.45 | 0.25 | 0.15 | ||
| Min. measurable roughness (Sa) | µm | 0.15 | 0.075 | 0.05 | n.a. | n.a. | n.a. | 0.25 | 0.1 | 0.08 | ||
| Min. measurable radius | µm | 5 | 3 | 2 | 20 | 12 | 10 | 5 | 3 | 2 |


Đánh giá
Chưa có đánh giá nào.