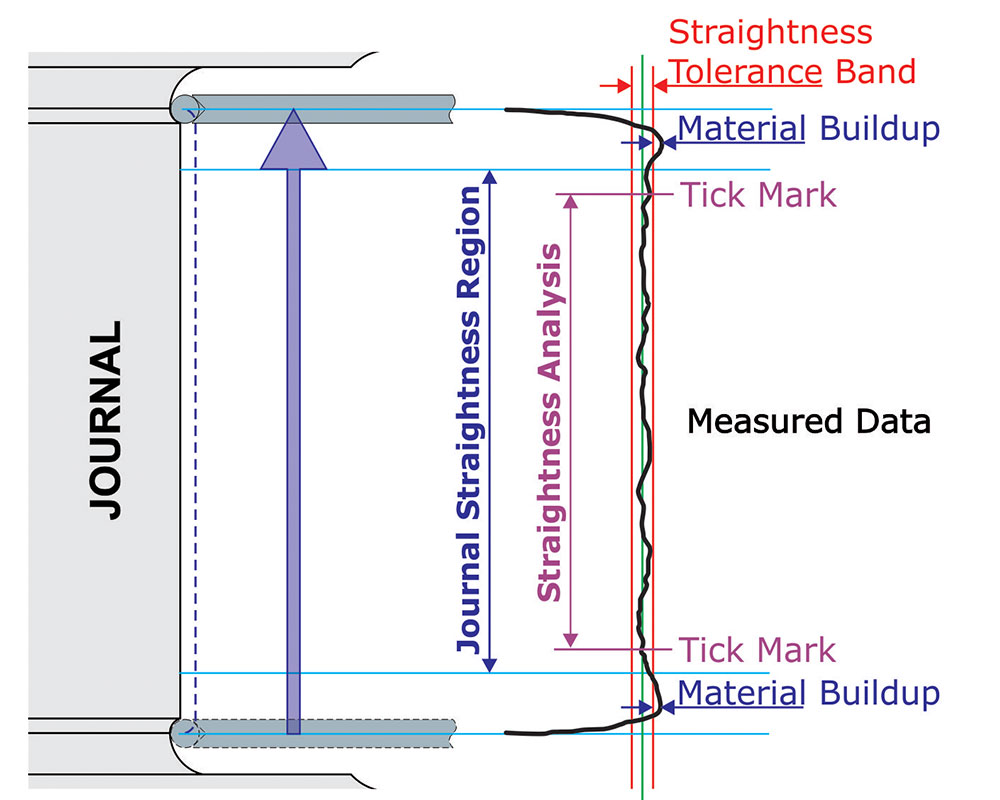
Straightness is a tolerance that controls the form of a line somewhere on the surface or the feature. Incremental straightness looks at lobing the linear data occurring in a specified interval over the distance of a scan.
Adcole Advanced Straightness Software extends the ability to use a sliding window of a specified length to determine the largest peakto- valley error and the location in the scan data that it occurred.
Industries
- Aerospace
- Automotive
- Heavy Diesel Equipment
- Industrial
- Locomotive Engine & Rail
- Marine
- Power Generation
- Pumps
- Robotics
- Small Engine & Appliances
- Transportation/Trucking
Compatible Gages
- 1100
- 1100-GX
- 1200-DH
- 1200-LX
- 1200-SH
Components It Measures
- Camshafts
- Crankshafts
- Heavy Diesel Crankshafts & Camshafts
- Sliding Camshaft
Features It Measures
- Bearing Journal
- Crankgear
- Crankpin Journal
- Crank Pump
- Camshaft Journal
- Camshaft Lobe
- Face Perpendicularity
- Face Runout/Total Runout
- Journal Undercut Depth
- Journal Undercut Radius
- Post Slope
- Timing Flat
- Timing Notch
- Timing Pin
- Trigger Wheel Angles
Parameters It Measures
- Individual Lobes
- Percent Difference
- Measure Amplitude
- Measure UPR
- Tolerance
- Start Angle
- Maximum of All Lobes
- Percent Difference
- Measure Amplitude
- Measure UPR
- Tolerance
- Start Angle
- Maximum of Average Lobe Chatter
- Percent Difference
- Measure Amplitude
- Measure UPR
- Tolerance
- Start Angle
Features & Benefits
- Provides sliding window technology to analyze a section of a specified length to obtain focused data about a specific area of a camshaft or crankshaft
- Offers manufacturers the ability to define a window, or a segment, of a part and obtain data about the window in inch or millimeter-spaced sections
- Enables engineers to detect maximum peak-to-peak error over a small, specified segment of a part
- Affords complex crankshaft manufacturers the ability to use a sequence of sliding windows to find the maximum peak-to-peak error over small segments
- Provides an accurate source of information for determining the source of manufacturing issues
- Allows manufacturers to determine if their process is experiencing a grinding wheel breakdown, tooling issues, or other complications associated with the machines or tooling being used to make parts

Đánh giá
Chưa có đánh giá nào.