To ensure that dental implants grow into the jaw quickly and without complications, they require a specific roughness of their surface properties. Teeth are as individual as the people they belong to.
The manufacture of dental prostheses, which is still done manually and is very time-consuming, is correspondingly individual. Implants in particular are complex to manufacture: their outer surfaces are made of titanium alloys or zirconium oxide ceramics and must have a certain roughness and surface geometry in order to grow well into the jaw and to be permanently resilient. In some cases, a bioactive coating is also used to accelerate the healing process. To achieve this, these surfaces are structured using various methods, such as blasting with particles, chemical treatment with etching solutions, lasers or lithographic processes. “The goal is to achieve an optimized and repeatable surface topography,” explains Mario Adam, Regional Sales Manager 3D Surface at Mahr.
Surface Roughness Permanently Under Control
 To achieve the necessary roughness tolerances, manufacturers continuously check the surface roughness during the manufacturing process. “The topography of the crown is measured to quantify the volume removal after wear tests,” explains Adam. “But the rounded implant tips, the radius, height and angles of the thread, and the roughness in the thread base and flank are also carefully measured.” In addition, the volume and preferred direction of the surface must be taken into account, which influence the ingrowth of the implant into the bone tissue of the jaw.
Confocal Measurement
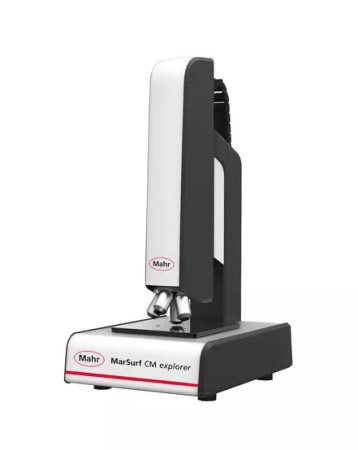
Measuring these minute surfaces is best done in a non-contact, near-production and non-destructive manner which is easily achieved with the confocal microscopes of the MarSurf CM series – at the touch of a button and in any production environment. The MarSurf CM explorer is a compact confocal microscope that can be used to precisely measure and analyze surfaces in three dimensions. Due to its robust design and insensitivity to environmental influences, the MarSurf CM explorer is not only suitable for use in test and inspection laboratories but is also ideally equipped for quality assurance in production environments.
The patented technology enables the non-destructive measurement of polished, rough and transparent surfaces, coatings, as well as roughness measurement according to DIN EN ISO. The steep flanks of the surface structure of the implants can be precisely inspected with the high-precision lens with high numerical aperture [NA] and the HDR camera. The measuring system is fully equipped with automatic lens recognition and collision detection in all spatial directions. The flexible and user-friendly optical measuring system is successfully used for roughness measurement according to DIN EN ISO, for topography measurement as well as for measurement of microgeometry and layer thickness.
Fore more information: www.mahr.com
Tags: 3d vina, hiệu chuẩn, hiệu chuẩn thiết bị, máy đo 2d, máy đo 3d, máy đo cmm, Painless Confocal Microscope Measurement of Dental Implants, sửa máy đo 2d, sửa máy đo 3d, sửa máy đo cmm
