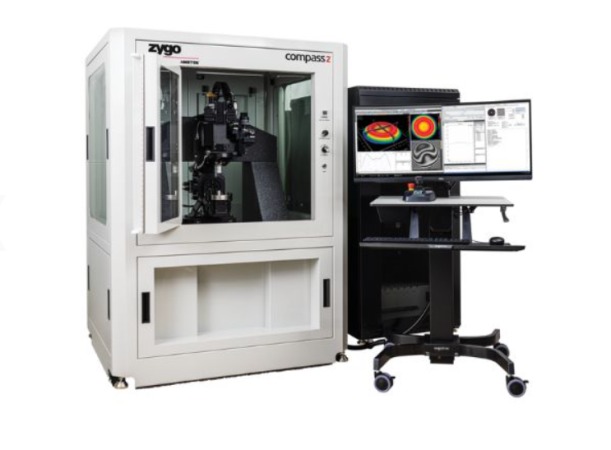
Zygo Corporation has announced the release of Compass 2, its latest optical profiler with Diamond Turning Machine (DTM) optimization and freeform surface metrology capability. Unlike comparable solutions, mold pins remain on their manufacturing fixture during metrology shortening the time to data processing and minimizing uncertainty from remounting and re-aligning the sample. With new interface improvements, the Compass 2 now delivers 3x better form deviation performance than the original Compass.
 Over the last decade, the Compass and Compass RT metrology systems have set the standard for non-contact, automated 3D surface metrology and production process control for discrete micro lenses and molds to compact imaging systems, such as cameras for tablets and smart phones, and automotive vision systems.
Eric Felkel, Product Manager at ZYGO says, “The Compass 2 is designed for the analysis of rotationally symmetric spherical and aspheric, geometrically truncated, and freeform surfaces. It can measure both discrete lenses and injection molding pins; and the instrument has been specifically tailored to meet the needs of manufacturers using this process with a series of new capabilities.”
“Beyond just DTM integration, the Compass 2 has the necessary XYZ precision to report nm-level roughness data that includes automatic generation of high frequency texture and tooling mark surface maps. A unique feature is the ability to click at a point on a data map and the system quickly navigates to that specific location on the sample for a more detailed inspection.”
Diamond Turning Machine (DTM) tool path correction support: The data obtained by the Compass 2 can now be directly used to optimize a DTM toolpath by automatically exporting 3D prescription deviation data for use with multiple DTM platforms as well as multi-platform software such as DIFFSYS™.
DTM tool setup support: Compass 2 supports DTM Tool setup with tool offset and tool radius measurement for spheres and aspheres and can report predicted surface deviation after offset and radius correction.
DTM fixture support: The new Compass 2 sample interface includes a standard vacuum chuck fixture which supports DTM chuck/jigs with a diameter between 10-155 mm and weight up to 0.8 kg. Mold pins can remain on their manufacturing fixture during metrology, shortening the time to data and minimizing uncertainty from remounting and re-aligning the sample―particularly when conducting measurements for tool path correction.
Freeform support: As the designs for mobile device cameras evolve, freeform surfaces are being increasingly used. Freeforms are designed with little or no symmetry, which makes them challenging to measure for most metrology instruments. Compass 2 now includes both freeform and truncated surface analysis in its software package. Compass 2 uses its ability to track a surface during measurement to capture the freeform surface. The platform will compute the deviation of that tracked surface to the optical prescription of the freeform in the same way as traditional aspheres over a full 3D measurement area.
A completely new platform: Compass 2 has been designed from the ground up with an emphasis on robust metrology and high confidence. This plays to the use of highly accurate metrology tools in-process rather than in-lab, and often working in extremely dynamic and challenging areas on the factory floor. Improvements include new isolation platform with 10x better seismic isolation, highly optimized support structure, enclosure and user station are fully decoupled from the instrument along with separated electronics rack to isolate noise sources away from the metrology. The enclosure and equipment rack also allows easier installation, easier servicing, easier measurement part access, and reduced vibration and turbulence at the machine.
Legacy metrology tools can be challenged with measuring larger slope angles, can be time-consuming, have a small measurement range, and have a small working distance. The Compass 2 addresses these challenges by using optimized non-contact, three-dimensional coherence scanning interferometry with field stitching―making it the platform of choice for system-critical micro-optical surfaces.
For more information: www.zygo.com
Tags: 3d vina, hiệu chuẩn, hiệu chuẩn thiết bị, máy đo 2d, máy đo 3d, máy đo cmm, Optical Profiler Offers Diamond Turning Machine Optimization with Freeform Metrology, sửa máy đo 2d, sửa máy đo 3d, sửa máy đo cmm
