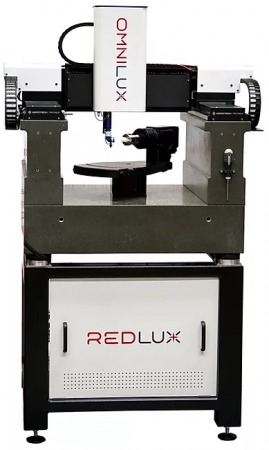
 The OmniLux optical metrology system provides unparalleled levels of 3D CMM data capture for component measurement in seconds. This high precision non contact, metrology system is extremely versatile since it can measures components of any geometry and of any material. The generated high precision, non-contact, data-rich metrology makes it ideal for both orthopedic industry production and R&D applications.
Geometries to be measured include: spheres, asphere, cylinder, internal bore, cone/taper, step height or freeform surface in any material such as polished or rough metals or ceramics and polymers. The Omnilux is fast and accurate because, unlike direct contact sensors, the use of optical sensors means that the whole surface can be analysed while the object is suspended in space, ensuring that no damage comes to delicate surfaces.
The RedLux non contact CMM measurement systems can take measurements of a great variety of forms and compare the results to CAD or analyse the measured data for wear. The optical CMM’s measures sphere radius, depth of the component and the deviation from a perfect sphere over a 240º coverage angle.
OrthoLux generates data-rich 3-dimensional images and provides on-screen results for analysis upon measurement of artificial implant completion.
The hip cup rim plays an important part during the orthopedic manufacturing process, since the last few millimeters of contact loading between the head and cup edge can have a significant impact on how long a hip joint lasts. The process of finishing the rim of a cup during manufacturing is separate from the creation of the main bearing surface. This often leads to an axial misalignment or continuity disconnect between these two important features of the joint. Although the cup rim is generally very well specified, it is a difficult feature to control in manufacturing and verifying the profile is very difficult and has been impractical. OrthoLux has the ability to speedily analyse the artificial hip cup including the rim with highest precision, providing data-rich information on geometry and possible deviation from design intent.
For more information: www.redlux.net
Tags: 3d vina, hiệu chuẩn, hiệu chuẩn thiết bị, máy đo 2d, máy đo 3d, máy đo cmm, Optical CMM Provides 3D Data Capture, sửa máy đo 2d, sửa máy đo 3d, sửa máy đo cmm
