Advanced coordinate measuring equipment has traditionally been classified into three main categories of coordinate measuring machines (CMMs), optical digitizers and scanners (ODS), and video measuring machines (VMMs).
Originally the three coordinate measuring products were principally focused in different market sectors:
- CMM – machined, stamped, fabricated and medium and large plastic parts
- ODS – reverse engineering
- VMM – small parts, electronic components and assemblies
Today, with the increased array of available sensors and software functionalities of ODS and VMM devices increasing, these originally product categories are becoming increasingly blurred. Multi-sensor capability CMMs have now emerged whereby different sensors technologies can be utilized in a single measuring equipment solution allowing part topology and geometrical part features to be inspected in a single part inspection set-up..
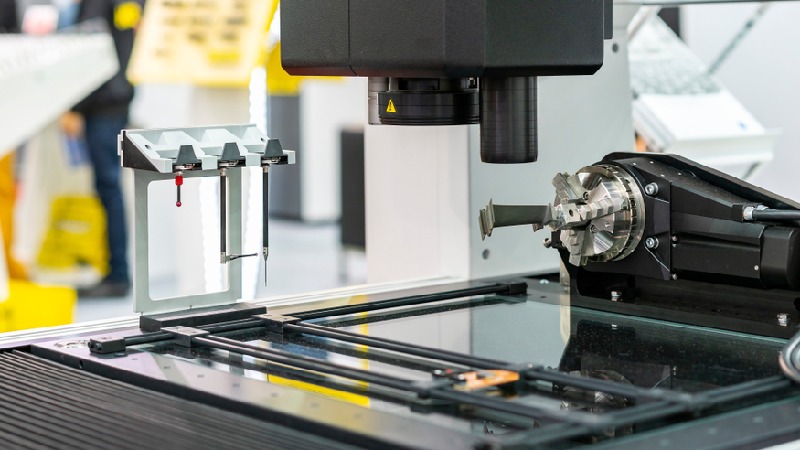
Multi-sensor machines have been available in the market for some time whereby tactile, optical and laser sensors are integrated onto a single measurement platform. Sensors being either manipulated around the part using a combination of machine and motorized head motion (CMM) or the part presented to the sensor using a combination of linear and rotary machine motions (VMM). Some larger and more sophisticated VMMs have an integrated motorized probe head providing an increased combination of machine and sensor motions for the most complex part inspections.
As part inspection moves out of the laboratory and onto the production floor a single measuring station, with multiple sensing technologies, is demanded by many applications to ensure the capture of 100% of part geometry in a single measuring cycle. With the multi-sensor equipment configurations came the need to expand metrology software’s to incorporate the numerous sensing technologies into a seamless user experience allowing for a common inspection part program.
Most CMM manufacturers have been adding multi-sensor capabilities to traditional tactile CMMs over past years as well as VMM manufacturers adding additional sensors to their machine structures to extend further measurement capabilities. Today, almost all of the global CMM suppliers now also supply multi-sensor VMM’s ensuring they can offer a multi-sensor solution regardless of the customer application requirement.

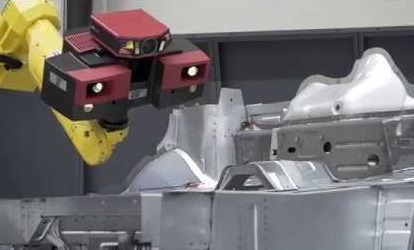
The penetration of structured light scanning sensors, mounted onto a standard 6 axis industrial robot, has penetrated the automotive sheet-metal and car body inspection markets over past years ousting the horizontal coordinate measuring machine – traditionally used for these applications. The robotic CMM (RCMM) offers a shop-floor production solution, with rapid capture and generation of complete 3D surface geometry, geometrical feature extraction from the generated point cloud and immediate CAD comparison and analysis. The overwhelming trend of industry to capture everything and extract only the needed part geometry for process control is a far different approach that of the traditional CMM and multi-sensor CMM approach whereby the CMM software is instructed what to measure feature by feature.
CMM and VCMM mechanical frames remain the most accurate ‘sensor carriers’ available today. Despite attempts to enhance the 6 axis robot measuring accuracy performance by error mapping, externally tracking robot position or use of photogrammetry techniques, the robot measuring solution does not match the accuracy needed by many component manufacturing processes.
Over past decades CMMs have become faster, more accurate, and lower priced. Developments by CMM manufacturers have included making structures stiffer, lighter and thermally compensated for use outside of the traditional temperature controlled quality laboratory. There has been much speculation over the past decade associated with the demise of the CMM but in reality what is the alternative where high precision is a prerequisite? The CMM is affordable, reliable, repeatable and accurate. Any replacement technology needs to be all of these … and more. Is it any surprise that the CMM market continues to be strong and the CMM platform is now finding a new role in integrating with the next generation of sensor technologies.

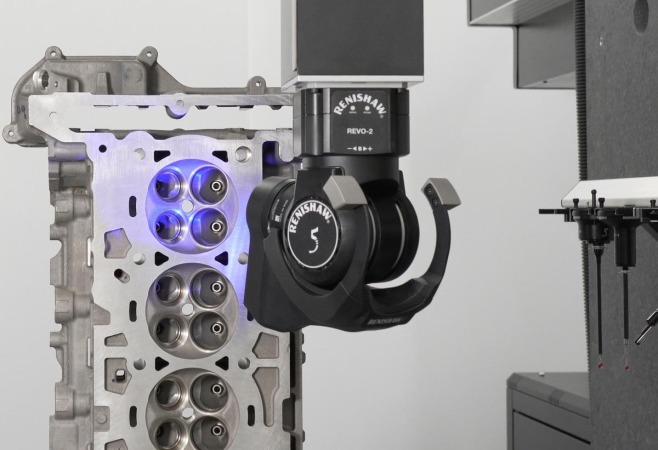
Renishaw recently introduced its RFP structured light optical scanning probe which adds another dimension to the CMM platform as a multi-sensor carrier and acknowledges the advantages found by manufacturers who implemented both hand-held and robotic RCMM structured light scanning solutions. The RFP probe increases the multi-sensor capability of the Renishaw 5 axis REVO system, which now offers five interchangeable probe families, including optical and surface finish. The RFP probe is designed for the inspection of free-form surfaces and complex geometry, rapidly delivering patches of surface data with a high point density. Unlike some other non‑contact structured light systems, the RFP fringe probe does not require reference markers to stitch together data from different part areas.

Wenzel has introduced the WM | HS Hybrid Sensor which combines the advantages of optical and tactile measurement technology. The unique, “double-eye” sensor ensures good point accessibility and even collects reliable data with the axis of the light beam up to 85ᵒ to the surface normal.
With its ability to switch automatically and quickly between the Renishaw tactile probe and optical sensor, the WM | HS is able to execute complex measurement tasks. The combination of high-speed optical measurement and micro-precise switching measurement with the touch-probe guarantees fast and accurate results for quality control and is designed for use in production environments. Based on triangulation technology, the sensor achieves maximum productivity, especially for elongated components with small radii, such as turbine blades.
DWFritz has developed its ZeroTouch CMM featuring a patented 5-axis metrology platform which includes a rotating bridge that is claimed to achieve part inspection speeds up to 10 times faster than conventional tactile coordinate measuring machines (CMMs). The metrology platform’s unique bridge configuration incorporates multiple non-contact measuring sensors including optical, laser, and confocal technologies, providing simultaneous part feature inspections.
ZeroTouch combines multiple non-contact sensor technologies with custom multispectral lighting and deep learning capabilities in one footprint. This highly configurable system simultaneously measures multiple part features and complex geometries such as bores, undercuts, and chamfers, in addition to complex surface topology measurements such as surface finish, color and gloss.
Hexagon offers a full range of multi-sensor solutions including its Optiv Dual which consists of three technologies purpose-built for multi-sensor operations, enabling users to drive productivity by enhancing application flexibility, reducing cycle times, and increasing accuracy. Each tool has its own particular strengths and focus in terms of productivity enhancement, but all three are united by the fact that they make multi-sensor measurement simpler, more streamlined, and less time-consuming.
The ZEISS range of O-INSPECT multi-sensor measuring machines enable users to optimally measure each part characteristic – optically or by contact. The ZEISS Discovery.V12 zoom lens comes from the ZEISS Microscopy division. Compared to standard lenses it provides a 4x larger visual field and high quality image definition also in the peripheral zones resulting in reduced measuring time and excellent accuracy. O-INSPECT machines incorporate the VAST XXT scanning sensor, Discovery.V12 Zoom Lens and Dotscan white light distance sensor fully integrated into its Calypso metrology software.
The original demarcation between CMM, VMM and ODS has all but been eroded with the RCMM also entering the fray. The latest emerging sensor technologies have now thrust the multi-sensor platform into main stream shop-floor metrology applications. These advanced multi-sensor dimensional metrology platforms have also just got a whole lot smarter with blue-light optical scanning sensors now also becoming available on the CMM platform allowing a new range of high precision inspection applications to be ‘captured’ by these advanced measuring solutions.
There is indeed a huge choice of multi-sensors solutions available to users today, allowing a one-size measures all adoption, and impressively all measuring functionality provided by a seamlessly integrated metrology software.
For for information:
Tags: 3d vina, hiệu chuẩn, hiệu chuẩn thiết bị, máy đo 2d, máy đo 3d, máy đo cmm, Multi-Sensor CMM – One Machine Measures All, sửa máy đo 2d, sửa máy đo 3d, sửa máy đo cmm
