Walking exhibition floors over the past months brought into focus the preeminent role the coordinate measuring machine (CMM) still plays in manufacturing operations as it remains the ‘go-to’ dimensional inspection tool for high-precision manufactured parts. One recent market study predicted the total coordinate measuring machine market will reach $5.6 billion by 2026 with the industry growing at a 6.9% CAGR over the coming period.
While there is little technological advancement in the core CMM mechanical frame to report there is a renewed focus on multisensory CMM platforms.
‘One-Touch’ Integrated Measurements
With the trend for part inspection transitioning, from the laboratory to the production floor, a single measuring station with multiple sensing technologies, has a renewed focus and is now the preferred solution for many applications ensuring the capture of 100% of part geometry in a single measuring cycle. The use of multiple pieces of inspection technology to generate a full part inspection report, requiring multiple measurement set-ups, results in an unacceptable ‘lag-time’ for many lean manufacturing operations.
Multi-sensor CMMs integrate different sensor technologies into a single measuring platform allowing both part topology and geometrical part features to be inspected in a single-part inspection sequence, and in a common frame of reference. The integration of these platforms near-line or even in-line thus becomes a further possibility as measurement becomes more automated, and integral to manufacturing, in the smart factory.
Multi-sensor machines typically include tactile, optical and laser sensors, all being manipulated around the part using a combination of machine and motorized head motion (CMM), or the is part presented to the sensor using a combination of linear and rotary machine motions as is the case with video measuring machines (VMM). Some larger and more sophisticated VMMs have an integrated motorized probe head providing an increased combination of machine and sensor motions for the most complex of part inspections.
With multi-sensor equipment configurations also comes the need for more advanced metrology software incorporating the various sensing technologies into a seamless user experience – all controlled by a single inspection part program.
Almost all CMM manufacturers have been adding multi-sensory capabilities to their traditional tactile CMMs over the past years as well as VMM manufacturers adding additional sensors to their machine structures to further extend measurement capabilities. Today, many of the global CMM suppliers have also expanded their product portfolio’s with multi-sensor VMM’s ensuring they can offer a multi-sensor solution regardless of the customer application demands.
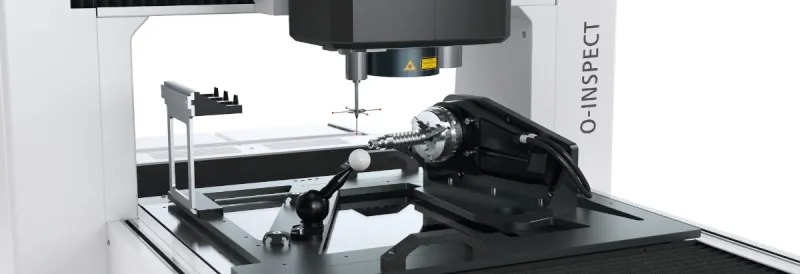
The ZEISS range of O-INSPECT multi-sensor measuring machines enable users to optimally measure each part characteristic – optically or by contact. The ZEISS Discovery.V12 zoom lens comes from the ZEISS Microscopy division, and when compared to standard lenses, provides a 4x larger visual field and high quality image definition also in the peripheral zones resulting in reduced measuring time and excellent accuracy. O-INSPECT machines incorporate the VAST XXT tactile scanning sensor, Discovery.V12 Zoom Lens and Dotscan white light distance sensor fully integrated into the Calypso metrology software.
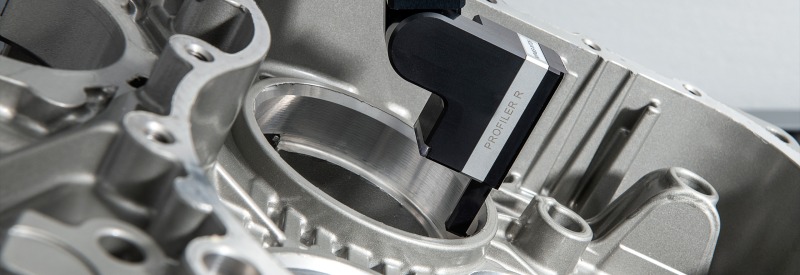
We have seen several additional sensing technology options for multi-sensor CMMs launched recently with one such technology adding surface finish measurement as an option. The PROFILER R from Hexagon enables quick and easy inspections of a surface profile within a CMM inspection program. Measuring all common roughness parameters, the PROFILER R can be automatically swapped onto several different scanning sensors, adding surface profile inspection without the need for part reclamping. Adding more measurement capabilities to typical measurements and evaluations of a CMM allows profile inspection to become a standard part of the inspection routine, ensuring all the relevant parameters of a workpiece can be checked.
With its ability to rotate through 360° and pivot by 180° the PROFILER R offers maximum flexibility and accessibility. After the support adaptor touches the workpiece, the measuring stylus is extended and moves along the surface to collect the measurement data, while the PROFILER R itself remains static throughout the measurement.
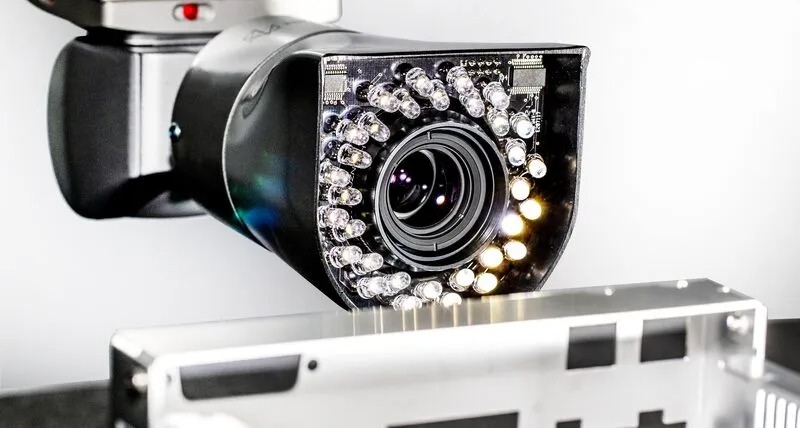
The Hexagon HP-C vision camera measurement system (header image) for CMMs can measure small features, sensitive or easily deformed components and deliver throughput for applications where image capture is faster than tactile probing. The HP-C is equipped with a high-resolution camera and a built-in illumination system. With a working distance of 110 mm and two zooming options, the HP-C is an extremely flexible solution, especially when features are too small for tactile probing. The entire Field of View (FOV) or specific Regions of Interest (ROI) within the FOV can be used to select one or more features for measurement, such as hole diameters or edge positions. Software control of the illumination allows the user to optimise the image for each measurement.
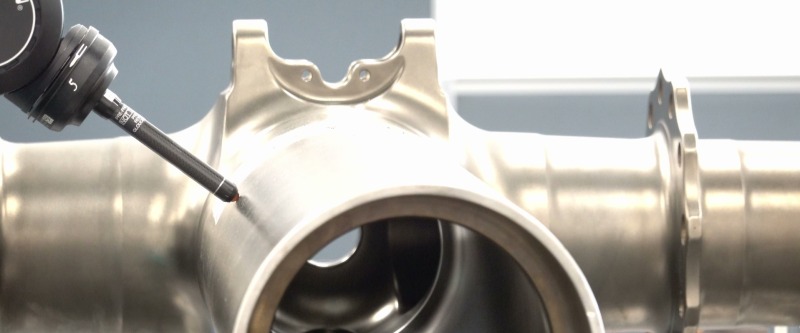
The Renishaw 5 axis REVO measurement capabilities have been expanded over past years and now encompass numerous sensor technologies including tactile scanning, non-contact optical inspection; structured light scanning and surface finish measurements turning the REVO platform into an expansive multi-sensor CMM solution.
The recent RUP1 ultrasonic probe addition increases further the multi-sensor capability of the REVO system by offering ultrasonic thickness inspection. Unlike many other ultrasonic systems, RUP1 does not require the use of water tanks or coupling gel to enable a good transmission of the signal. Instead, it uses an innovative elastomer tip ball to provide excellent coupling between the probe and the material. As a result, the RUP1 probe eliminates the need for skilled operators to interpret oscilloscope screens. The use of ultrasonics for single-sided measurement of part thickness delivers clear advantages over traditional tactile probing techniques for parts where access to internal features is challenging.
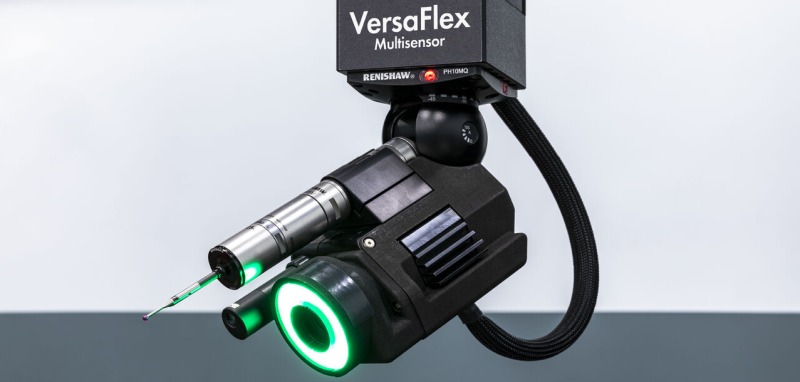
The OGP VersaFlex multi-sensor array offers up to three simultaneously available sensors on an articulating probe head. Users gain the ability to measure parts with a scanning probe, telecentric optics, and the TeleStar interferometric laser without experiencing down time while individual sensors are exchanged in a sensor change rack, and with no requirement to recalibrate each time a sensor is used. The video probe provides completely non-contact measurement of complex parts using a unique QVI designed lens system and high resolution camera with integral illuminator. The assembly combines QVI’s long experience in precision optics and imaging in a compact and powerful sensor assembly for use on an articulating probe head. The TeleStar Probe is a high resolution interferometric laser sensor with a small spot size for point or surface scanning. VersaFlex is available on the OGP FlexPoint CMM model range.
The traditional tactile CMM and optical VMM are both morphing into comprehensive multi-sensor measuring solutions, equipped to support both quality and process control, as manufacturing transitions to become smarter and more automated.
One size may not fit all but a multi-sensor CMM inspection system just might!
Tags: 3d vina, hiệu chuẩn, hiệu chuẩn thiết bị, máy đo 2d, máy đo 3d, máy đo cmm, Multi-Sensor CMM Delivers ‘One-Touch’ Integrated Measurement, sửa máy đo 2d, sửa máy đo 3d, sửa máy đo cmm
