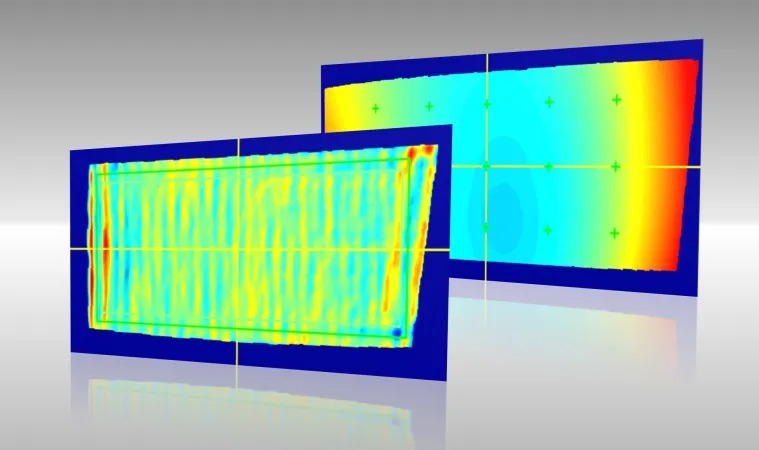
Stringent quality demands are placed on components with glossy and reflective surfaces. Reflective and curved surfaces are often extremely sensitive and therefore difficult to inspect – yet precise quality control procedures are vital for manufacturers. With its SpecGAGE3D product family, ISRA VISION provides the ideal solution for quality inspections of reflective surfaces, for example, injection-molded components.
 Reflective and glossy surfaces often enable the creation of high-quality and individual designs. As such, the demand for products with reflective surfaces is increasing continuously. These include housing parts for electronic devices, displays, rear-view mirrors, or deflection mirrors in head-up displays, as well as car exterior components such as B pillars, panels, decorative trims, tank caps, or headlights. Today, piano black as a high-gloss variant of plastic surfaces in vehicle interiors has become almost standard in high-quality automobile construction.
These products are usually manufactured using injection molding processes, where hot, liquid plastics are injected into a form or mold and then left to cool and harden. After the plastic has cooled completely and the mold has been opened, the hardened plastic ideally has the exact form to perfectly fit the hollow space in the vehicle. However, processing errors can result in numerous faults and defects on the component. Manufacturers must differentiate between two challenges when it comes to quality control:
First Challenge: Reliably Detect Cosmetic Defects
Cosmetic defects, such as burrs on the joints, impurities, or inclusions, are often caused by incorrect injection pressure. It depends on the component whether these defects can be rectified in downstream processes or if they are insignificant. For non-transparent components, or if they are polished, painted, or coated after the injection molding stage, surface defects are often not relevant at this stage of the process. However, this is not the case for defects which occur after coating or painting, including scratches or orange-peel effects. These cosmetic defects on glossy components are easily apparent to the human eye. Yet common inspection procedures such as strip projection or photogrammetry that are based on diffuse reflection, are barely able to detect them and transform them into usable measurement data. Measuring processes such as white-light interferometry are rarely viable here due to their often insufficient measurement field size. At the same time, manual surface inspection of these parts is a laborious, expensive, and error-prone procedure.
Second Challenge: Reliably Detect Form Defects
Unwanted deformations remain one of the typical defects of injection-molded components. Among other causes, these can occur when the temperature of the mold or in the injected plastic is not set correctly. Distortions and indents can also emerge if the surface collapses. For example, if the injected plastic mass in deeper areas of the component shrinks or not enough plastic was injected.
When it comes to optical components such as head-up displays, distortions in the millidiopter range can significantly impair the component function. In contrast to cosmetic defects, these distortions cannot be seen by the naked eye, thereby prohibiting manual inspection.
Deflectometry Detects Both Form and Defects in a Single Measurement
 Phase-measuring deflectometry is a particularly reliable process for measuring reflective or partially reflective surfaces. With its SpecGAGE3D sensor range, ISRA VISION has set new standards and perfected the process.
The system projects stripe patterns onto the reflective surfaces to be inspected. The reflective stripe pattern is then recorded by multiple cameras from different perspectives and evaluated. Based on the distortion of the recorded stripe pattern, the topology of the component can be calculated.
The topology determined through this process is then compared to the CAD model – a digital twin of the component – in just a few seconds. A height difference map, accurate to the micrometer, illustrates the deviations from the expected model. At the same time, the sensor detects local roughness and cosmetic defects on the surface.
In a time-saving single measurement step, SpecGAGE3D reliably detects the form and any defects on high-gloss injection-molded components, and other reflective or transparent components. By comparing the images to the CAD model, the system detects pitch deviations down to the millidiopter range, with local defects being detected right down to the nanometer range. Paint defects, inclusions, injection defects, and other faults are detected, classified, and documented quickly and reliably. The conclusions drawn from these inspections allow the processes to be adjusted quickly, thereby optimizing productivity – resources and machine running times are saved. Moreover, shorter measurement times enable higher cycle rates to be achieved. This complete measurement process puts zero-defect quality within reach – both from a technical and economic standpoint.
For more information: www.isravision.com
Tags: 3d vina, Form Measurement and Defect Detection for Glossy Surfaces, hiệu chuẩn, hiệu chuẩn thiết bị, máy đo 2d, máy đo 3d, máy đo cmm, sửa máy đo 2d, sửa máy đo 3d, sửa máy đo cmm
