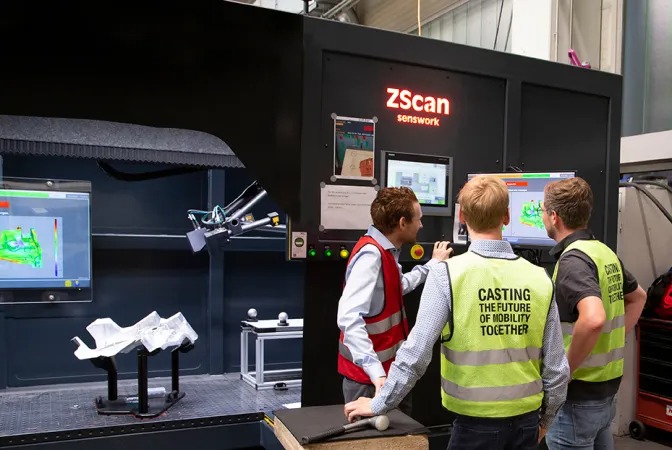
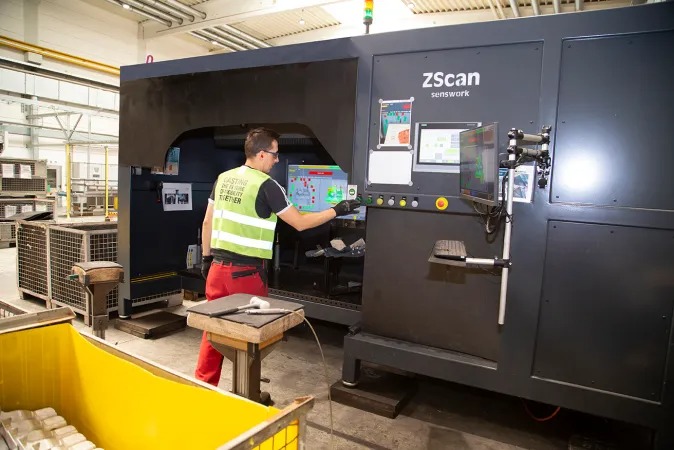
Dimensional inspection of large, geometrically complex components, such as aluminum die-cast components for the automotive industry, have so far only been able to be validly measured with great effort. Measurement in the measuring room requires a corresponding capacity and is time-consuming; so-called ‘Gage-Checks’ require a certain planning, procurement and implementation time. Now a new innovation has opened up new possibilities with the 3D measuring system ZScan. Senswork has developed a solution that is always ready for use and that produces a valid measurement result in seconds and is installed directly in production.
“The investment was worth it”
 The measuring speed and flexibility were what made the ZScan system from senswork so convincing at Magna. The automotive supplier had been looking for an optical measuring and testing system suitable for series production for a long time when the Bavarian measurement technology expert senswork came into play. Was the investment worth it? “The summary is definitely positive,” say Rocco Hahn, Head of Project Management and Martin Emrich, Project Manager at Magna. The investment pays off after just a few product launches.
100% Inspection of Pilot and Small Series Production
With this one system, various die-cast aluminum components can be checked for their dimensional accuracy in seconds – and without any pre-treatment. With this speed, the ZScan goes beyond the capabilities of a pure measuring system and qualifies as a means of production. A capability study carried out by Magna comparing the measurement results from the measurement room with those of the ZScan confirmed its high measurement quality and the validity of the measurement results. Components can thus be regarded as validly tested by ZScan without further testing in the measuring room. It offers a perfect and very flexible supplement in the pre-series and small series, in which every component leaves production 100% inspected.
76% Faster Start-Up Time
In the application, every component up to a length of 1.60 meters can be scanned with the flexible optical measuring system. Processes in the start-up phase benefit in particular from the component-unspecific application possibility, precisely because type-specific measuring equipment is no longer required. The investment is lower, the speed higher. Start-up times for new products can be significantly accelerated with a time saving of several weeks compared to conventional solutions.
Automatic CAD Comparison
 The inspection process also has great functionality. Within a few seconds, the 3D multi-sensor scanner ZScan scans the respective aluminum die-cast component and automatically compares it with its CAD model. Four mutually calibrated laser scanners are used, which, due to their free spatial arrangement, record even geometrically complex component surfaces with almost no shadowing. ZScan also effortlessly masters slightly shiny surfaces such as aluminum – and without any pre-treatment.
The result OK versus NOK is displayed on a panel and displayed as a red-green comparison in flowing color gradations using a precise 3D false color image. In addition, the panel visualizes a free number of measuring points, which are evaluated according to the RPS system. The dimensional measuring points are displayed in green, exceeding and falling below the tolerance or deviations from the target size in red and blue. In combination with the additional false-color image that can be captured quickly, the workers can make targeted geometry corrections directly after the measurement process, which takes seconds. ZScan can thus be used efficiently as a means of production with an associated manual straightening process. Checks between and after the straightening can be carried out at any time and the process can be repeated until the result is OK.
Wide Range of Measurement Functions
Straightening processes are standard in the production of structural components made of die-cast aluminum such as at Magna BDW. The heat treatment at almost 500°C causes distortions in the components, which have to be corrected in the downstream process due to precise specifications. It is precisely at this point that ZScan shows its strengths with up to 20 million measuring points per individual scan: The combination of previous RPS alignment, selective 3D measurement and false-color CAD comparison is particularly helpful in production: “You can see a lot of details, which cannot be detected with conventional measurements. This is both a bit of a blessing and a curse in production,” says Rocco Hahn, Head of Project Management at Magna, “but it was definitely well received by the customer”.
Easier Process Optimization
This functionality also offers engineers a lot of information with regard to process optimization. Components can be inspected before and after each production step, such as the heat treatment of aluminum die-cast parts. Individual scans can be compared with each other and shape deviations can be visualized in color. This enables more insight into production processes in every process step. Series of measurements can be created, archived and evaluated by the software with ZScan. The influence of parameter adjustments in the process is already made measurable during production. The process steps can thus be optimized in a targeted manner based on data.
“We want to use it to produce parts and not just generate the measurement quality” states Rocco Hahn.
And there is another special feature: not the trained measurement technician, but the worker himself operates ZScan directly in production. This enables it to be used as a means of production and at the same time saves capacity in the measuring room. “The user-friendly operation and a clear selection of components enable a very fast training process for new employees of around 30 minutes, so that employees in the shift can look after ZScan themselves,” says Martin Emrich, project manager at Magna. Any employee can also change components. ZScan withstands the demanding production environment with dust, dirt and temperature fluctuations.
For more information: www.senswork.com
Tags: 3d vina, chuẩn thiết bị, Fast & Flexible Production 3D Inspection, hiệu chuẩn, máy đo 2d, máy đo 3d, máy đo cmm, sửa máy đo 2d, sửa máy đo 3d, sửa máy đo cmm
