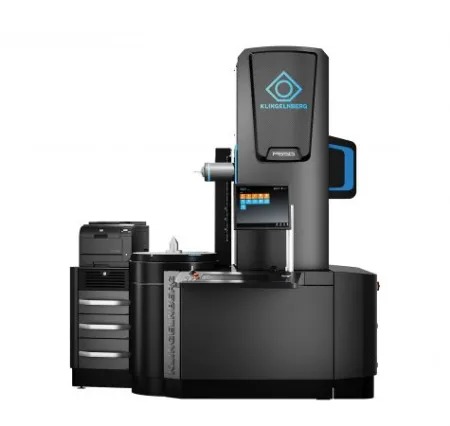
Roller bearings have to fulfill a variety of different tasks. They have to provide high stability for shafts while providing low power losses and a high durability. Therefore the requirements concerning material, geometric and form accuracy as well as surface roughness, are challenging for manufacturing. To ensure the quality in today’s manufacturing environment a variety of different precision measuring devices is required. Typically dimensions are measured on a CMM, form and noise on a form tester, surface roughness on a surface tester and contours (e.g. edge radius) on a contour measuring station. This results in high investment and operating costs. Finally the operator has to setup the part on all different stations, which makes the measuring process quite long and keeps the operator unnecessarily occupied.
 Up to 46 % Savings in Operating Costs
Klingelnberg follows the “Done-In-One” principle. A Klingelnberg P-machine is capable of fast measurement of dimension, form, contour and surface roughness in one setup and one automated cycle. This reduces the investment and helps to reduce the operating cost by an average 46 %, compared to current practices in bearing industry. On top, the measuring machines of the Klingelnberg P-Series keep the necessary accuracy even on the shop floor, saving the air conditioning costs and bringing the measuring machine really close to production. By removing the need to install multiple machines, customer benefits additionally from saving expensive factory space.
The Precision Measuring Center
The precision measuring centers from the Klingelnberg P-Series are manufactured from steel and cast iron. The temperature behavior throughout the whole machine is similar and predictable and is therefore compensated. In addition, the complete absence of granite, makes the machine totally insensitive to humidity. Therefore the accuracy can be achieved within a temperature range of 15 to 35 °C with a maximum allowable variation rate of 2 °C per hour and 12 °C per day. To be prepared for the shop floor, the machine can even be equipped with an active vibration platform so that all influences of external factors can be fully isolated. Klingelnberg has a ten year record of more than 500 measuring machines performing high precision tasks on the shop floor throughout the world. The rotary table, by itself has a radial run out of 0.2 μm only. Together with the Klingelnberg designed measuring head 3D NANOSCAN the capability to perform form tests is therefore fully guaranteed. An automatic three-jaw chuck offers controlled and low clamping forces. For very thin rings it can be equipped with magnets on the jaws to fix the part as shown in Figure 2. This allows high precision form testing with absolutely no influence of the clamping on the measuring results.
Done-In-One Measurement of Roller Bearings
Generating the measuring program with the Klingelnberg “Shaft Software” is an easy task. For roller bearings an automatic measuring cycle generation based on a parametric description of roller bearings is available. Thus the measuring program for one bearing type only needs to be generated once. By reading in the parameters from a data source the measuring cycle for different sizes of this bearing type are automatically generated without any user interaction. An example of different bearing sizes with the parametric measurement program generation is shown in Figure 3.
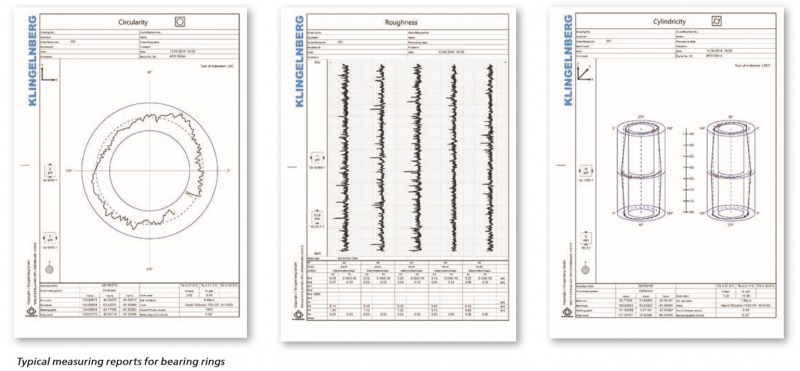
An example with results for different kinds of measuring tasks are shown below Standard tables with the actual values, the nominal dimensions and tolerances for GD&T measurements as well as graphs giving an idea of the form error shape are listed here. This way the machine operator receives all necessary information in order to analyze the manufacturing process and find measures for quality improvements. For surface roughness, there are options to choose the graphical view as well as the specific values according to the relevant standards. Special evaluations are also available including the Fast Fourier analysis FFT to analyze roundness errors as well as noise issues caused by a bearing. Since all these analyses are performed on the same machine with a fast rotary table and a scanning probe, measuring time can be reduced up to 46 % compared to a standard setup.

All these measurements can be performed on the shop floor. The measuring machines of the Klingelnberg P-Series are all equipped with temperature compensation by design as well as a temperature model to ensure accuracy in a production environment. In addition roller bearings and linear guides are used to ensure the high robustness compared to standard CMMs with air bearings and guides. Klingelnberg combines its knowledge from precision metrology and machine tools to ensure its unique combination of precision and robustness.
For for more information: www.klingelnberg.com
Tags: ‘Done-In-One’ Automated Measurement Solution, 3d vina, hiệu chuẩn, hiệu chuẩn thiết bị, máy đo 2d, máy đo 3d, máy đo cmm, sửa máy đo 2d, sửa máy đo 3d, sửa máy đo cmm
