The Composite Centre of the University of Sheffield’s Advanced Manufacturing Research Centre is a state-of-the-art facility for advanced composite manufacturing research and development. Based in a dedicated extension to the AMRC Factory of the Future, in Rotherham in the United Kingdom, the centre’s research is focused on manufacturing and machining composite components, including hybrid parts that combine high-performance metals and composites in a single structure.
 Using cutting-edge methods to produce ultra-lightweight components from the newer composite materials is at the heart of the AMRC Composite Centre’s daily work. These materials are increasingly used in aerospace, marine, automotive and other highvalue industries because they combine high strength with low weight. This excellent performance comes at a cost however, as these advanced materials present a host of manufacturing challenges.
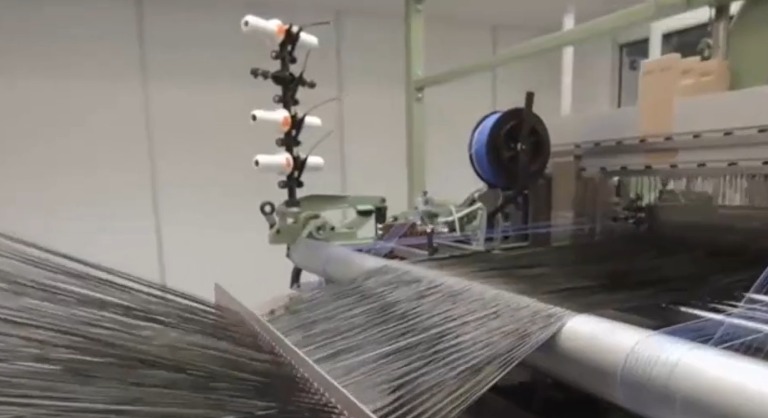
Composite components are made by layering plies of unidirectional fibres or woven fabrics, which are the cured to produce a final solid part. There are a number of ways of combining the fibres into a sheet that can then be layered into a part, each typically involving a large degree of automation, such as automatic fibre placement (AFP) systems or robotic braiding systems.
The strength of a composite part is very much dependent on the correct alignment of the fibres of which it is made – it’s all about fibre orientation. Fibres which are laid poorly can result in a range of defects that affect the structural integrity of the final part. Detecting such defects, from gaps and overlaps to the presence of foreign objects and debris, at the relatively early laying up stage of production is much more efficient and cost effective than only realising the material has unacceptable weak points once it is part of a completed component.
 That means quality checks during the laying up process are of vital importance. An inspection of the laid fibre needs to be made between the putting down of every layer to ensure that the fibre orientation remains within the required parameters throughout the material. With composite parts for thick aerospace and automotive structures being made up of dozens of layers of plies, these checks can obviously be quite time-consuming, particularly when you consider that the established method of inspection is a visual check performed manually by an operator with a magnifying glass.
Zeeshan Qureshi, Lead Research Engineer on the Design Analysis and Composite Automation team at the AMRC Composites Centre, explains that 70 percent or more of total machine time is taken up by this sort of manual inspection. “It’s a huge cost to our partners,” says Qureshi, “which is why we’re investigating some of the potential automated in-process inspection systems that would help significantly decrease or even eliminate entirely manual inspection in order for them to achieve higher productivity in their factories.”
 Developing new solutions for manufacturers of any size all over the world is what the AMRC Composite Centre is all about. “Our customers vary from major aerospace players such as Airbus, Boeing, Rolls Royce and BAE Systems, all the way to some of the automotive OEMs such as McLaren and Toyota Motorsport,” says Qureshi. “But we’re not limited only to working with OEM or Tier 1/Tier 2 suppliers. We’re also here to help some of the local SMEs, to help them solve some of the manufacturing and design problems that they’re having in their facilities and become more competitive out there in the market.”
Providing those businesses with cutting-edge new solutions is where Hexagon’s composite inspection solutions join the story. The AMRC Composite Centre’s research into the inspection aspects of composite material production began with a market survey and close collaboration with other groups within the AMRC as well as commercial partners, to find out what systems were being successfully employed in related applications. This background work brought to their attention the capabilities of the Absolute Arm and its various laser scanner options.
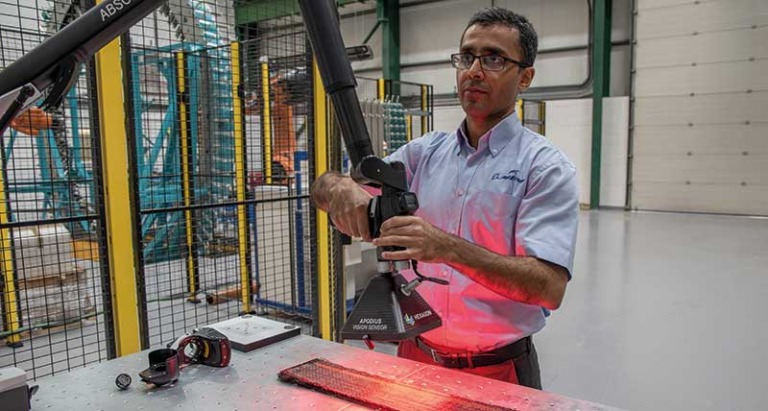
“We discovered that Hexagon have developed a composite inspection system specially for measuring fibre orientations, which we believed could be a potential candidate for solving some of our inspection problems,” says Qureshi. They were quickly able to bring one such system into the centre to perform a case study – an Absolute Arm with RS5 Laser Scanner and Vision System 3D.
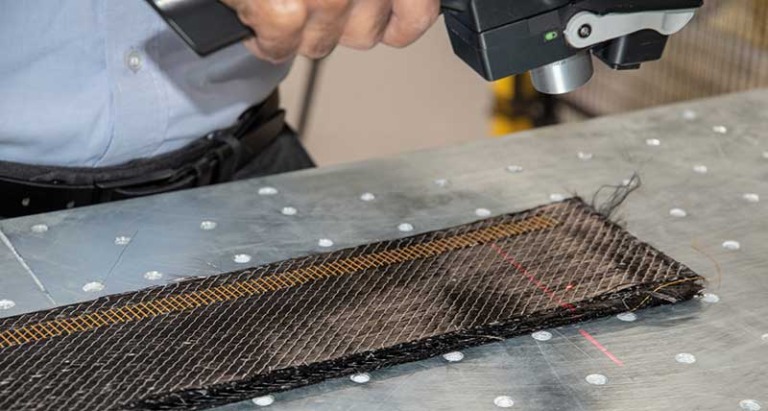
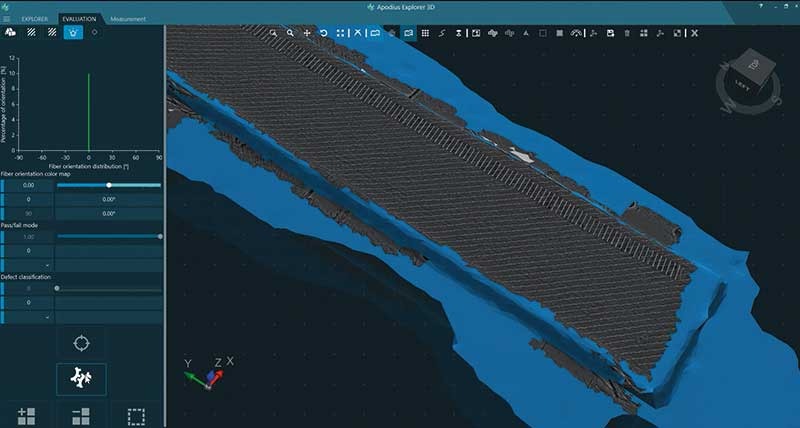
The Vision System 3D is a camera-based sensor that can accurately detect the orientation of individual composite fibres. The system uses the Absolute Arm for position referencing, and, combined with scans made using the arm’s laser scanner functionality, this fibre orientation data can be mapped onto a three-dimensional model of the part being inspected using the dedicated Explorer 3D software platform.
The team was quickly able to apply the system to some of the inspection quality assurance checks demanded by their composite part production processes, primarily ones involving measuring the fibre orientations of the composite parts. “The system lets us validate the design and simulation work that we do at our desks to make sure our design intent is being manufactured, so it becomes a good validation step for our design and manufacture process,” says Qureshi.
“We’re primarily using the system for weaving and braiding as well as after the preforming process,” says Qureshi. “That could include things like 2D, 2.5D and 3D weaving or forming the dry fabrics into final shape with thermo-mechanical processes. Once we perform that initial manufacturing process, we can bring the part to the workstation and we would use the new inspection system to do a scan of the part to generate the 3D profile of the part we have. Following that we would then go on and take images of the surface that we’ve just scanned. Using some of the advanced algorithms that are built into the software, we’re then able to determine fibre orientations and that can give us an indication of some of the defects that are present in the part.”

“We can take that information back into our design and analysis software to update our models with the data from the as-manufactured part in order to perform an analysis which we can then compare against the asdesigned part. This provides valuable information for comparing the ‘real’ and ‘virtual’ environments in which we work.”
But that isn’t the end of the process. It’s important that this inspection data can be fed back into the production process in order to improve future manufacturing runs. “As a first step we can try to correct some of the programs and minimise those defects through better programming,” says Qureshi. But sometimes defects ;just come down to the nature of the geometry or the condition of the materials, and for those type of defects an appropriate repair procedure can be performed instead, whether that be removing the particular layers or the section and relaying them onto the surface again.
From there it’s on to curing and post-processing, followed by parts being sent for non-destructive testing to ensure they meet the required quality assurance parameters.
The software algorithms on which the Vision System 3D is built are at the heart of what makes this such a ground-breaking solution for the AMRC. “Explorer 3D has a highly developed, highly robust algorithm for detecting fibre orientations,” says Qureshi. “This was very useful for us because knowing how accurate the fibre orientations are of your part, it gives us very valuable information to compare against out designs, in order to get a comparison of what the structural performance would be like in the as-manufactured part.”
“One of the advantages of having this system is that the sensor can be integrated with other composite layup machines as well, such as the AFP machine, braiding, stitching, or 2.5D or 3D weaving machines that we have within the AMRC,” says Qureshi. “So we can basically take the system, mount it onto our other composite manufacturing systems, which would require the designing of some fixtures for attaching the sensor. Once we have done that we can easily go ahead and start performing in-process or online inspection, in order to further reduce the overall inspection time that our partners are facing.”
For more information: www.hexagonmi.com
Tags: 3d vina, Critical Fibre Orientation Measurements Ensure Composite Part Integrity, hiệu chuẩn, hiệu chuẩn thiết bị, máy đo 2d, máy đo 3d, máy đo cmm, sửa máy đo 2d, sửa máy đo 3d, sửa máy đo cmm
