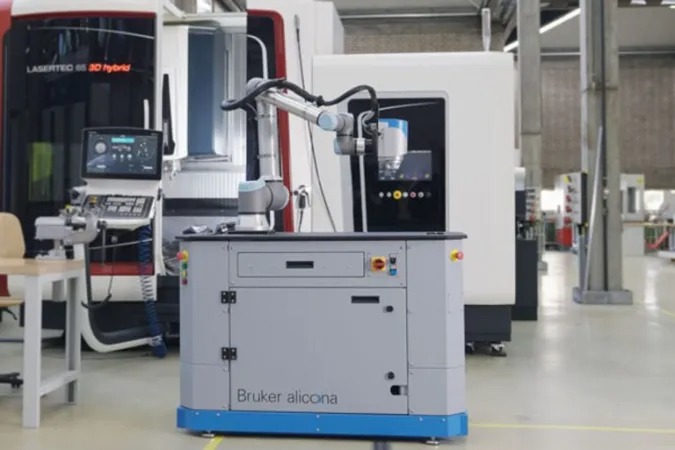
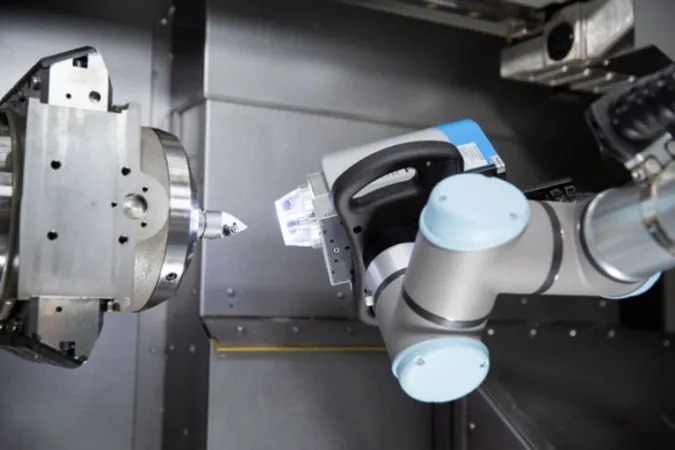
At the Institute for Machine Tools (IfW) at the University of Stuttgart, a Compact Cobot relieves employees of the task of measuring tool wear. The system consists of a UR10e from Universal Robots and an optical 3D measuring sensor from Bruker Alicona. It enables measurements directly in the machine tool, eliminating the need to clamp and unclamp the tool. Measurements have thus become faster and more efficient.
The Role of Tool Wear in Machining Processes
 More than 30 scientific employees conduct their research at the IfW in the following areas: design and optimization of machine tools, cutting manufacturing technologies and additive manufacturing. The IfW team provides important insights into Industry 4.0, including studies about the use of tools in machining processes and the associated tool wear, but also about the effects on the machined workpieces. Tool wear plays a crucial role in machining processes. It affects tool costs for companies and has a direct impact on surfaces. In the past, researchers had to unclamp the tool from the machine, transport it to the measuring device and clamp it there, which was a time-consuming task. This challenge, combined with measurement inaccuracies during reclamping operations, let the IfW team implement a new, automated approach.
Clamping and Unclamping is No Longer Necessary
 The solution was a cobot-based measuring system that measures tool wear as well as the effect on the machined workpieces. The Compact Cobot used at the IfW can be moved directly up to the machine tool. Therefore, the team does not have to unclamp tools and materials separately. In addition, unlike in the past, the cobot can also be used to measure very large components and tools. First, the sensor is guided to the desired measuring position. The joysticks integrated in the handles additionally enable high-precision positioning. “Clamping and unclamping is now no longer necessary. The entire measuring process is now significantly shortened, simplified and improved,” says Mr. List-Kaul, Project Manager Customer Solutions at Bruker Alicona.
Focus-Variation Allows Highly Precise Measurements
The precision of the measuring system is particularly special. By combining the stable UR robotics with the Bruker Alicona measurement system and the Focus-Variation measurement technology, high-resolution 3-D data sets can be generated which allow users to make measurements in the micro- and nanometer range. In the next step, these data are used for further analysis. “Thus, the customer achieves an accelerated economic process.”
“The operation of the Cobot is very intuitive. Many colleagues and students are now working with it. Once you have programmed the measuring points and the sequence, the Cobot takes over the measuring process all by itself” stated Sarah Eschelbacher, Group Manager Process Monitoring and Control, IfW Stuttgart.
For more information: www.alicona.com
Tags: 3d vina, Cobot Increases Efficiency In Tool Wear Measurement, hiệu chuẩn, hiệu chuẩn thiết bị, máy đo 2d, máy đo 3d, máy đo cmm, sửa máy đo 2d, sửa máy đo 3d, sửa máy đo cmm
