Control of Material Expansion
The ARC® – Airframe Related Components division overhauls and repairs fan reversers, engine cowlings, flight controls, aircraft noses (radomes), and other secondary structure composite components. In addition to maintenance work, repair, developments, all types of material support, and logistics solutions are provided. These services are offered for civil aircraft and nearly all popular aircraft types.
To repair the above-mentioned components, adhesive trays made of carbon or glass fiber are used. Shapes and contours must be checked regularly. The production process takes place under the influence of pressure and temperature variations in an autoclave, so that the material can expand. The extent of the expansion is determined by periodic scans. It is not a one-off project—but a regular measure to ensure quality standards.
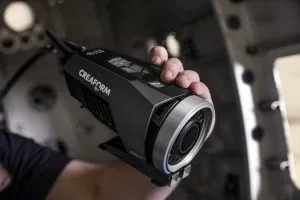
The actual state is checked with Creaform’s HandySCAN 3D scanner or, for large objects, with the photogrammetry camera MaxSHOT 3D and compared with a CAD model (target state). On the software side, the data acquisition software, VXelements, is used for data acquisition. On top of providing reliable measurements, Creaform systems are used for other applications, such as reverse engineering, with the help of VXmodel scan-to-CDA software module.
Decision Criteria and ROI
Before LHT started using Creaform systems, measurements, data processing and reverse engineering were provided by a third-party company. The quality of the data as well as the duration of implementation and flexibility in changing conditions led to the decision to purchase hardware and software, thereby building the company’s internal know-how.
Decisive for the choice of the measuring systems were the compactness of the devices as well as the simple data acquisition with the HandySCAN 3D scanner. With these key features, it is possible to capture complex geometries with relatively little effort. In addition, the accuracy for the intended applications is sufficiently high. The MaxSHOT 3D helps to ensure unprecedented accuracy even for larger objects. Currently, the measurement systems are used exclusively in a workshop environment under (mostly) controlled, climatic conditions.

“The control of the material expansion could have been measured with other common measuring systems, but the price-performance ratio and the compactness of the 3D measuring systems from Creaform made the decision easy. In addition, the customer service is impeccable,” explained Gunnar Hinrichs, who works at the Airframe Related Components Department at LHT. “In terms of ROI, the purchase has also paid off, even if we do not yet have any meaningful data. But it is likely, according to our own estimate, to have a give-figure amount in the lower segment, which we save on outsourcing. If we detect quality deviations at an early stage by using the Creaform technology, we can prevent unnecessary costs and therefore expensive reworking at the customers’ sites.”
Compact, Simple and Flexible
The experience with the Creaform systems is positive. “We can respond much faster and more flexibly to measurement tasks, discuss the measurement results directly at the measured component, and share information with other stakeholders. The systems consistently convince us we made the right decision with their compactness and simplicity of use. A measurement process, including pre- and post-processing (assembly, attachment of the targets, etc.), is completed within 2-3 hours. The data is available in real time. The software interface is well-implemented, understandable and clear. The training provided by Creaform is outstanding and the employees are always available for advice and support. That’s the way you want it to be,” said Hinrichs.
For more information: www.creaform3d.com
Tags: 3d vina, Aerospace Industry Composites Quality Control, hiệu chuẩn, hiệu chuẩn thiết bị, máy đo 2d, máy đo 3d, máy đo cmm, sửa máy đo 2d, sửa máy đo 3d, sửa máy đo cmm
