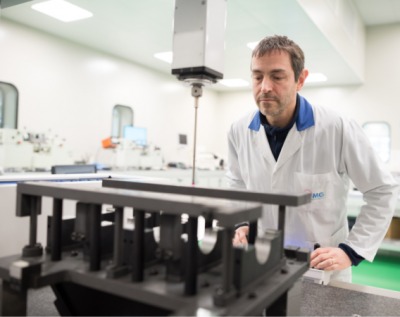
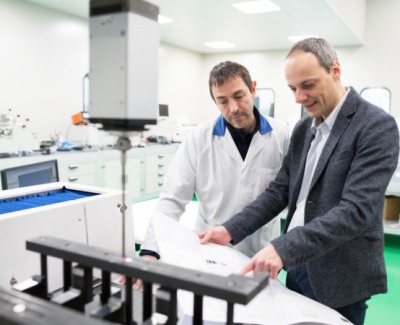
The Italian company MG Marposs knows all about accuracy. Headquartered in the city of Brescia, it has been using ZEISS measuring machines for the past six years to guarantee the quality of the measuring equipment and master components sold to customers. Thanks to their extremely positive experiences with these coordinate measuring machines, ZEISS CALYPSO software and ZEISS service, Marposs Group decided to purchase other ZEISS measuring machines in different manufacturing facilities.
Dog houses in the manufacturing area? Hardly an unusual sight in the production hall at MG Marposs. After all, they do produce dog houses. However, aside from the general shape, these have nothing to do with those dog houses for man‘s best friend. MG Marposs‘ dog houses are complex reference gages, such as those used for checking the quality of engine blocks, and enable employees to perform off-line inspections of engine blocks and compare them with the master. Employees manually move the cylinder-block to the housing and probe the individual characteristic. By looking at the screen, they can easily see whether or not the component is machined according to the required manufacturing tolerance.

“The dog house is our top product,“ explains Giuseppe Fausti, Managing Director of MG Marposs. “But we are proud of everything we produce and the unique breadth of our portfolio – from the inexpensive gage for 50 euros all the way to the large, automated assembly and inspection machines that can cost up to three million euros.“ Fausti explains that all MG Marposs‘ knowhow goes into making the dog houses since here gages, probes, automated solutions and master components all play an important role.
In this example, 80 zero points for the probe and 40 characteristics considered to align the measuring points and program the inspection software. Generally, tolerances of no more than 20 to 30 micrometers are required so that the engine block can ultimately be installed without any problem. Not surprisingly, stringent requirements are in place for the precise manufacture of the performance testing machines.
“This expertise has made MG Marposs the company it is today. When it comes to off-line performance testing, we are able to implement all customer requirements,“ says Fausti, the Managing Director. “At our company, we live by the rule that if something does not exist, then we develop and build it ourselves.“ This applies to not only customer orders, but internal needs as well.
That is why MG Marposs used to even build its own production machines along with the software if these were not otherwise available on the market with the necessary features and functionalities. The customers, most of whom come from the automotive, aerospace and machine tool building industries, appreciate the development expertise and flexibility of this company in northern Italy. “We are successful because we look for, identify and then implement solutions that benefit the customer, while also taking a long-term view rather than just focusing on making a quick buck,“ says Fausti.
Reference Gages – A Must-Have In Production
Developing and manufacturing inspection machines is not the only reason this Italian company enjoys a global reputation. A large portion of the MG Marposs product portfolio comprises good, manual go/no-go gages. “Gages allow for simple, offline testing,“ explains Roberto Frizza, Head of Quality Assurance at MG Marposs. “With these, you can quickly determine if a component‘s dimensions, angles and forms are within the specified tolerance.“
 This enables companies to perform 100% inspections on small and mid-sized production lots and random sampling for large batches without any difficulty. The gages must meet demanding precision requirements because of the continued increase in quality requirements along with the high degree of automation in assembly. And all for good reason: even small tolerance errors can lead to manufacturing stops, which have cost companies a lot of money in the past.
While precision of one-tenth of a millimeter might have been sufficient in the past, these days manufacturers must ensure an accuracy of one-hundredth of a millimeter. Thus modern test equipment must meet even stricter specifications. Frizza explains that his company receives orders for components with tolerances of just a few micrometers. Achieving this level of accuracy is no easy task, which is why MG Marposs continues to make ongoing investments in its quality assurance area, both by training employees and acquiring the latest measuring technology.
The focus on further improving component quality prompted MG Marposs to increase its measuring lab capacities six years ago. This marked the beginning of the company‘s collaboration with ZEISS. Fausti, the Managing Director, explains that at the time the company was entering uncharted territory: “Up until this point, we had been using measuring machines from other suppliers. In 2011, we introduced two ZEISS PRISMO ultra systems and one ZEISS MICURA at our site in Brescia. These deliver measurement results you can always count on.“
Key Differentiation: Precision and Service
 “We got multiple offers and compared them,“ says Fausti. “Ultimately, we opted for ZEISS.“ Frizza, the Quality Manager, adds: “The good service ZEISS offers in Italy is what ultimately put the company over the top.“ While MG Marposs is impressed with ZEISS service technicians‘ speed and attention to detail, the Italian company also values how ZEISS sees itself.
“The employees at ZEISS are very solution-oriented and think ahead,“ says Fausti. “They always focus sharply on the benefit to the customer and working together as partners – both of which are a top priority at our company, too.“ There was another issue that was crucial in the decision-making process: the remarkably user-friendly ZEISS CALYPSO software. “While switching to different software meant some up-front costs, this quickly paid off because we were able to better and more quickly leverage the coordinate measuring machine‘s full potential than with the competition‘s software.“
Before purchasing the ZEISS coordinate measuring machines, management first looked at the measuring results. The masters for measuring gears, camshafts and engine blocks require tiny tolerances of just a few microns with very little measurement uncertainty. This is the only way MG Marposs can keep the measuring uncertainties for equipment and machines measured using the masters to an absolute minimum.
“We primarily use ZEISS machines for two tasks,“ explains Frizza. “First, for inspecting component forms, i.e. flatness, roundness and dimensions like diameters and distances. And second, for certifying masters so that we can optimally adjust the inspection machines for our customers. You might say that we use ZEISS systems for good measure.“
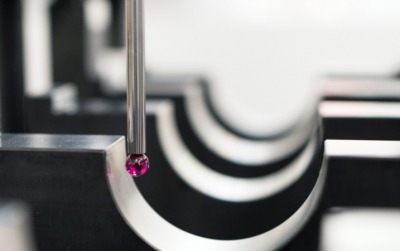
 The Italian company was also impressed with another ZEISS product: the active probe ZEISS VAST gold. “This enables us to capture characteristics crucial for measuring technology that we could not reach with other coordinate measuring machines.“
When MG Marposs made the decision to purchase the ZEISS systems, they knew they wanted to increase throughput in the measuring lab. The short measuring times of the ZEISS PRISMO ultra in particular went a long way in helping them achieve this goal. However, Roberto Frizza wants to make one thing clear: “The accuracy and repeatability of the measurement results is our primary concern, not speed.“
Word about the company‘s positive experiences with ZEISS have spread throughout the entire Marposs Group. In the future, all production sites will start using ZEISS measuring machines for quality assurance.
For more information: www.zeiss.com/metrology
About MG Marposs
MG S.p.A. was founded in Brescia, Italy, in 1954 and quickly developed into a leading company for functional checks, mechanical measuring systems and Assembly & Leak inspection machines. The Marposs Group took over the company in 2000. With this acquisition, Marposs – already a global market leader in precision equipment for measurement and control in the production environment – expanded its portfolio to include tools for function checks, while MG benefited from the Group’s international network. It was able to not only significantly increase its overall revenue, but also strongly grow its business abroad. Today, MG Marposs has 210 employees and generates revenues totaling around 45 million euros. The measuring lab of MG Marposs in Brescia is also an accredited calibration center. Here reference standards are certified for calibrating Marposs gages and master gears for go/no-go inspections. Each day, MG Marposs issues around 300 certificates.
Tags: 3d vina, CMM Ensures Inspection Equipment Precision, hiệu chuẩn, hiệu chuẩn thiết bị, máy đo 2d, máy đo 3d, máy đo cmm, sửa máy đo 2d, sửa máy đo 3d, sửa máy đo cmm
