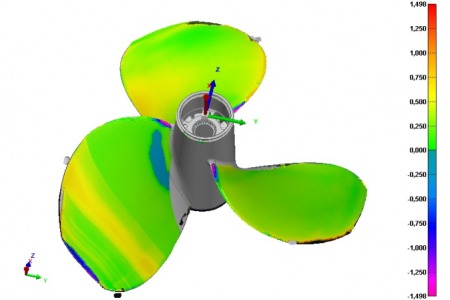
Italian metrology equipment supplier, Fratelli Rotondi, has released its OptiMe new stereo vision & photogrammetric based measuring system. It is composed of two high-resolution digital cameras with coaxial illuminators and a structured light projector. The system includes its proprietary software for data acquisition and processing. Furthermore, it can be easily used with any other measuring software on the market.
 The top model of OptiMe can acquire up to 7 million points in just a few seconds; this high throughput takes the system a step forward with respect to the common contact Coordinate Measuring Machines (CMM). Moreover, the absence of contacts allows the system to inspect flexible and soft objects, avoiding damage and bending. OptiMe is also capable of acquiring metal surfaces, with no need for part spraying, saving time, costs, and the use of polluting substances.
The system components are fixed to a carbon fiber plate which guarantees rigidity, stability, and very low sensitivity to thermal effects. In addition its lightness (from 4 to 6 kg depending on the model) allows the system to be easily transported, and makes OptiMe particularly suitable for in-situ assessments.
Not only is OptiMe fast and precise, but also versatile with the system working in two operational modes:
- Active mode: patterns of structured light are projected onto the object surface and read back by the cameras. In this way, OptiMe acquires dense clouds of millions of points obtaining a 3D representation of the object surface, even when it is smooth and lacks recognizable features. This working mode is particularly useful for both reverse engineering and quality control inspections. Therefore, CAD representations of physical models or, oppositely, comparisons between final products and their CAD models, are indeed possible.
- Passive mode: when features such as holes, slots, and margins, are to be detected, it is sufficient to project unstructured light in order to make these characteristics identifiable and measurable by the cameras. If only such characteristics, and no surface, have to be acquired, the structured light projector can be replaced by a simple illuminator, or even completely eliminated, so reducing the weight of the scanning head.
OptiMe is deployed in two main versions: OptiMe-S and OptiMe-L. The former has a field of view of 450 x 340 mm for a nominal working distance of about 1 meter, whilst the latter has a field of view of 2000 x 1500 mm for a nominal working distance of about 2.5 meters. By changing cameras and lens arrangements based on customer needs, customizable models are also possible. The accuracy ranges from 0.01 mm to 0.2 mm according to the field of view.
OptiMe is delivered with its own handy flight case and light tripod for positioning.
An entry level version (OptMe-EL) is also available on the market. With this version the user can take advantage of the technology at a very low price without giving up to accuracy. The Entry Level version is suitable for a wide range of applications from metals to plastic and from small to large size object.
OptiMe models can also be installed on existing machines including robots and milling machines.
The system requires a PC running Windows 10 and is supplied with its own acquisition and calibration software. The calibration process takes only a few minutes with the system remaining stable over time. The software allows several operations with one or more-point clouds. For instance, multiple scan alignments with both flat and spherical markers are possible, as well as the shape-based long-range alignment among different point clouds. Furthermore, point clouds can easily be transformed into meshes and exported in various formats, including STL and PLY. The system is compatible with most of the measurement software capable of importing mathematical models.
OptiMe applications range from the automotive to the aerospace sector, as well as in engineering fields where quick and reliable acquisitions of large surfaces are required.
For more information: www.rotondi.it
Tags: 3d vina, hiệu chuẩn, hiệu chuẩn thiết bị, máy đo 2d, máy đo 3d, máy đo cmm, Portable Optical Measuring System Launched, sửa máy đo 2d, sửa máy đo 3d, sửa máy đo cmm
