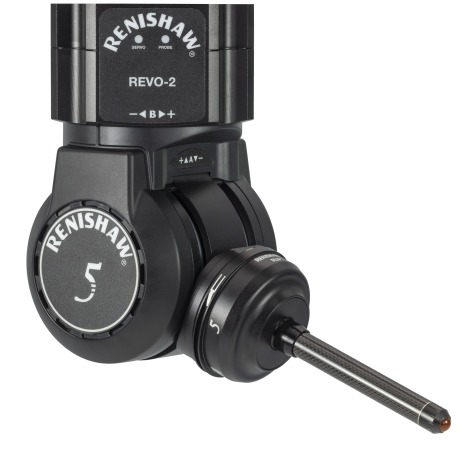
Renishaw will showcase its RUP1 ultrasonic sensor and RVP vision probe for its REVO 5-axis multi-sensor CMM measurement system at IMTS (booth 135509). From September 12th to 17th at McCormick Place Chicago, visitors can see the system alongside other products, including the extended range of modules for the SFP2 surface finish measurement probe.
REVO 5-Axis Multi-Sensor CMM Measurement System
The unique REVO 5-axis multi-sensor system synchronises the motion of the CMM and the measuring head’s two axes to minimise the CMM’s dynamic errors at ultra-high measuring speeds. The introduction of the RUP1 ultrasonic probe extends the system’s range to six interchangeable sensors. These provide tactile touch-trigger and scanning measurement, surface finish, ultrasonic thickness measurement, non-contact vision, and structured light measurement on a single CMM – all with the speed, accuracy and flexibility of a 5-axis system.
Ultrasonic Probe Enables Thickness Measurement With REVO System
 The RUP1 probe increases the multi-sensor capability of the REVO system by adding ultrasonic thickness inspection to the existing product range.
Unlike other ultrasonic systems, the RUP1 probe does not require the use of water tanks or coupling gel to enable a good transmission of the signal. Instead, the RUP1 probe uses an innovative elastomer tip ball to provide excellent coupling between the probe and the material being measured, eliminating the need for some dedicated ultrasonic equipment and integrating automated ultrasonic measurement into the REVO 5-axis multi-sensor system.
Ultrasonic thickness measurement delivers clear advantages over traditional tactile probing techniques for parts where access to internal features is challenging. Aircraft landing gear parts, power generation drive shafts, and hollow aerospace blades are all parts where the RUP1 probe will provide benefits.
Angle Change Mirror For RVP Vision Probe
ACM is an accessory designed to enhance access for the RVP non-contact vision system. Using a precision first surface mirror to provide a true reflection, the ACM rotates the field of view through 90° allowing vision inspection of bore surfaces and other features previously inaccessible to RVP. ACM is compatible with the VM11-2 module and mounts magnetically to a kinematic ring on VM11-2, allowing orientation at multiple positions to maximise part accessibility; 24 positions are available at 15° intervals around the VM11-2 axis.
Extended Range Of Surface Finish Probe Modules
Since the launch of the REVO SFP2 surface finish probe with expanded capability in 2017, Renishaw has released additional specialised modules, extending the surface finish measurement capability of the REVO system. The latest additions include the G1 and H1 modules. The G1 module comprises a special stylus for groove measurement and has its own unique analysis package. The G1 module is used in the measurement of grooves in engine cylinder bores prior to a plasma coating process (also known as LDS). The H1 module is characterised by its elongated skid with a large radius (125 mm), enabling it to be used with cut-off values greater than 0.8 mm. This makes it more tolerant of measuring parts that may not be perfectly clean, whilst still being compliant with international standards.
For more information: www.renishaw.com
Tags: 3d vina, hiệu chuẩn, hiệu chuẩn thiết bị, máy đo 2d, máy đo 3d, máy đo cmm, Renishaw To Showcase Innovative CMM Sensor Range, sửa máy đo 2d, sửa máy đo 3d, sửa máy đo cmm
