Testing systems for determining mechanical values, flow curves, and material hardness require excellent accuracy and repeatability. Reliable test data on the hardness, tensile strength, and flow curves of metals allow to assess the material quality, prevent confusion, and form the basis for further quality control and assurance. Material Testing Solutions expert, Imprintec, is a provider of mechanical material testing services. The company uses white-light interferometers from ISRA VISION for its testing systems, offering its customers both outstanding precision and fast measurement results.
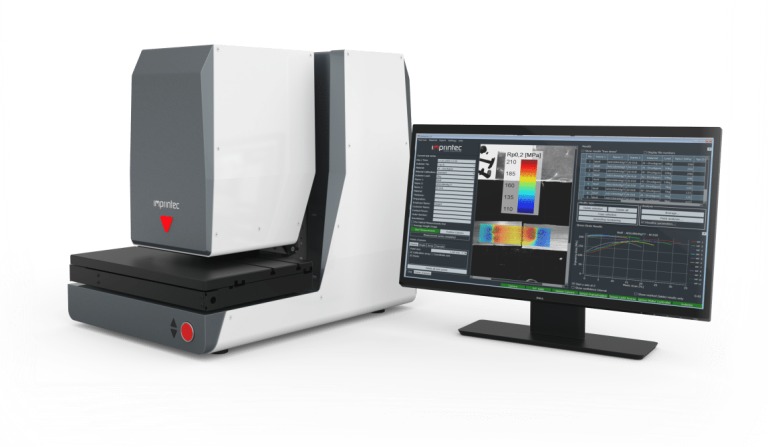
 Imprintec’s i3D testing systems are used in strength tests that aim to ensure clear identification and quality control of materials. They are also used for component tests and local inspections for heat treatments, hot working, or weld seams, for example.
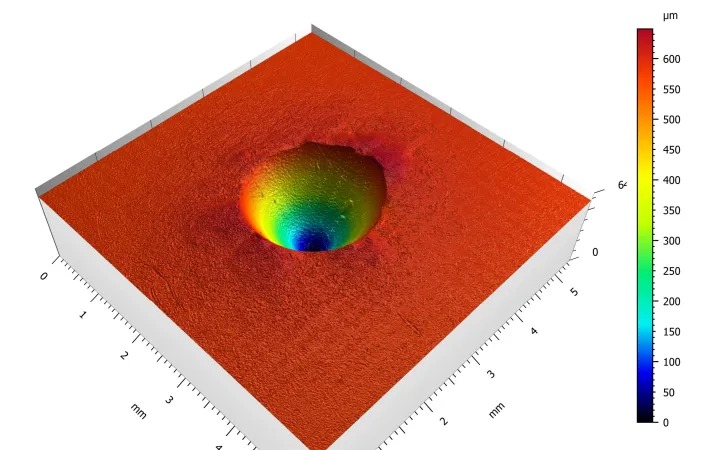
Another application is investigating the strength curves of partially press-hardened steel parts often found in the automotive industry – Imprintec uses the indentation process as per DIN SPEC 4846. This involves applying a minimal localized testing pressure, then creating an optical 3D measurement of the indentation and the surrounding collar. The data generated can be analyzed quickly and precisely using sophisticated algorithms and FEM simulations, providing insights into material properties like flow curves, yield points, tensile strength, and hardness.
“The optical measurement is part of the testing procedure at Imprintec. This requires the utmost measurement accuracy and repeatability. Another important factor is the lateral resolution,” says Peter Zok, application consultant at Imprintec. The test systems use NetGAGE3D white-light interferometers from ISRA VISION.

These deliver quick and reliable 3D measurement results to ensure short testing times. According to Peter Zok, the ability to adjust the sensors to fulfill custom requirements made them perfect for the process: “Thanks to the collaboration with ISRA VISION, we were able to tailor the optical sensors to our testing systems. This made integration much easier. The sensors can measure surfaces measuring up to 200 mm² quickly and in 3D, a huge leap forward over conventional point or line sensors.”
The NetGAGE3D sensors are based on the principle of white-light interferometry, in which white light is evenly directed onto the measured object and reference mirror. The reference mirror and measured object then reflect the beams back to the camera. Depending on the vertical structure and the surface of the object, different path lengths between the reference light and the sample are the result. These superimposition patterns are analyzed using software that calculates a distance for each point in the object, thereby producing a topographical image of the sample in the form of a surface height map. Because the measuring light and the camera lens of the NetGAGE3D are mounted coaxially, depths such as boreholes, channels, and etched structures are measured with high precision. On standard systems, the repeat accuracy of the measurements at a step height of 50 µm is typically around 100 nm, with an absolute accuracy of ±200 nm. Versions with increased precision are also available.
In addition to the technical features and customized configuration of the sensors, Imprintec also valued the simplicity of incorporating the NetGAGE3D sensors into the overall system. “The interface was easy to integrate and allowed us to program the sensors ourselves. That was a big advantage when it came to integrating them into our testing systems,” says Zok.
As a result, Imprintec was able to quickly develop and launch a compact device for quality assurance on components and materials in line with DIN SPEC 4846. It enables customers to determine the mechanical properties of their products quickly and precisely, thereby increasing quality and ensuring more reliable processes and reduced waste and complaints.
For more information: www.isravision.com
Tags: 3d vina, hiệu chuẩn, hiệu chuẩn thiết bị, Material Inspection Machines Use White-light Interferometry Achieving Fast Precision Measurements, máy đo 2d, máy đo 3d, máy đo cmm, sửa máy đo 2d, sửa máy đo 3d, sửa máy đo cmm
