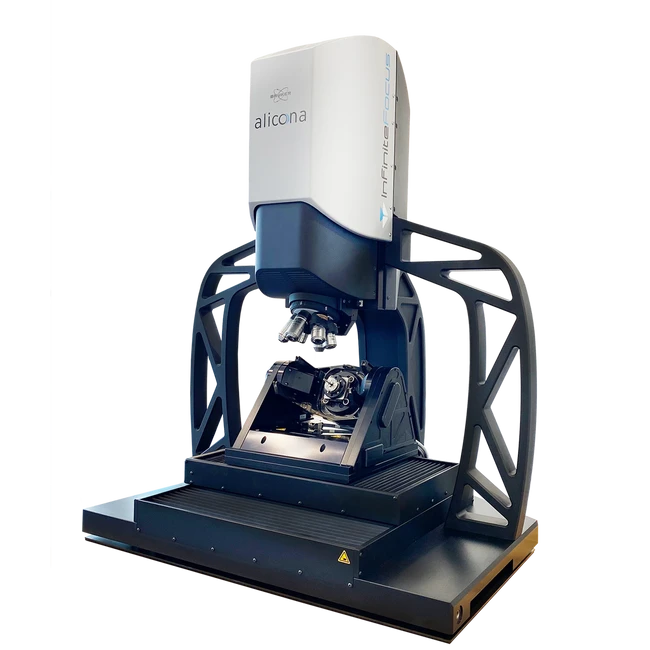
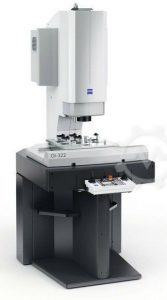
InfiniteFocus G6
Liên hệ
- Vận chuyển giao hàng toàn quốc
- Phương thức thanh toán linh hoạt
- Gọi ngay +84 978.190.642 để mua và đặt hàng nhanh chóng
MÔ TẢ SẢN PHẨM
InfiniteFocus G6 is an accurate, fast and universal optical 3D measuring instrument designed for optical surface roughness measurement & shape measurement, particularly for smooth and highly polished surfaces. Operating within the µm and sub-µm range, this device provides precise results regardless of component size, material, geometry, weight, or surface finish, all accomplished with only one optical sensor.
This innovative measuring device combines the functionalities of a roughness measuring system (Ra, Rq, Rz/Sa, Sq, Sz) with the characteristics of a coordinate measuring machine. Its robust Focus-Variation technology and the vibration-insensitive design ensure high-resolution and repeatable results, even when located directly next to the machine tool.
In addition to its exceptional performance in manufacturing settings, the InfiniteFocus G6 offers seamless integration with CAD systems for offline measurement planning. Furthermore, the device comes equipped with an automation interface, enabling fully automated measurements, making it an excellent choice for production environments.
MetMaX: “What do I measure?” not “How do I measure?”
This is the core thinking behind operating software MetMaX. Thanks to this evolution, users do not need any specific metrology knowledge to perform robust measurements with the InfiniteFocus G6. MetMaX contains all the necessary knowledge on how to acquire and evaluate 3D data. Learn more about MetMaX!

Pick & Place: Measurement automation solution
InfiniteFocus can be extended with a robot arm to automatically pick, place, measure and sort components. The system is based on the interaction between an administrator who pre-defines automation processes, the collaborative robot for the manipulation and placing of components as well as high-resolution optical 3D measurement technology.
![]()
10 questions about InfiniteFocus G6
The new InfiniteFocus G6 scores with its unique measuring performance, future-proof technology mix, groundbreaking user experience and high flexibility. Learn more about the optical measuring system for shape and surface roughness measurements in these 10 questions!
![]()
| Measurement Principle | Non-contact, optical, three-dimensional; Technologies: Advanced Focus-Variation (SmartFlash 2.0), Vertical Focus Probing, Real3D |
| Positioning volume (X x Y x Z) | 200 mm x 200 mm x 180 mm = 7 200 000 mm³ |
| Positioning volume (R x T) | AdvancedReal3DUnit (optional): Motorized rotation: 360° / Motorized tilt: – 15° to + 90° |
| Objective name | 1900 WD30 | 800 WD37 | 800 WD17 | 400 WD30 | 400 WD19 | 150 WD11 | 80 WD4 | ||
| Working distance | mm | 30 | 37 | 17.5 | 30 | 19 | 11 | 4.5 | |
| Lateral measurement range (X,Y) | mm | 3.8 | 1.6 | 1.6 | 0.8 | 0.8 | 0.3 | 0.16 | |
| Measurement point distance | µm | 1.77 | 0.72 | 0.72 | 0.36 | 0.36 | 0.14 | 0.07 | |
| Measurement noise | nm | 80 | 40 | 15 | 20 | 5 | 2 | 1 | |
| Vertical resolution | nm | 250 | 130 | 50 | 80 | 30 | 15 | 10 |
| Objective name | 1900 WD30 | 800 WD37 | 800 WD17 | 400 WD30 | 400 WD19 | 150 WD11 | 80 WD4 | ||
| Min. measurable roughness (Ra) | µm | n.a. | 0.7 | 0.18 | 0.24 | 0.12 | 0.05 | 0.03 | |
| Min. measurable roughness (Sa) | µm | n.a. | 0.35 | 0.09 | 0.12 | 0.06 | 0.025 | 0.015 | |
| Min. measurable radius | µm | 12 | 5 | 5 | 3 | 3 | 2 | 1 |


Đánh giá
Chưa có đánh giá nào.