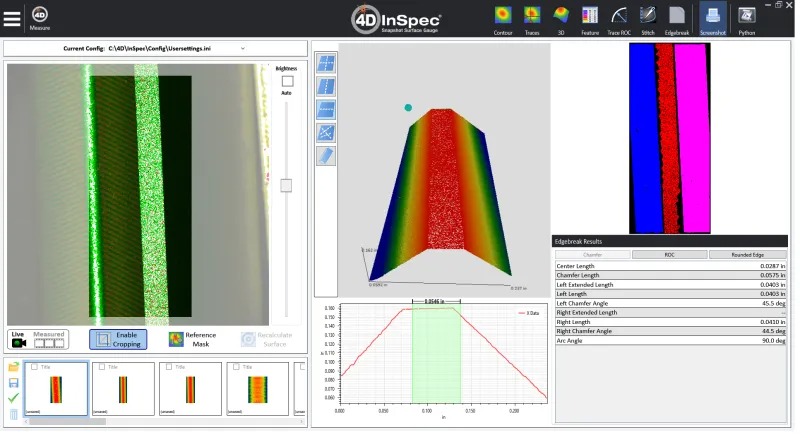
The 4D InSpec, which can be used as a handheld instrument, is also compatible with automated systems like robot arms and rotary tables. Using a robot arm to measure edge break, chamfer and round-off on aerospace parts provides a substantial increase in productivity and precision for the customer. The robot arm rapidly positions the gauge, while the 4D InSpec software takes a measurement, calculates the adjoining planes and then the shape, curvature and slope of the remaining surface after edge break and round-off.
In aircraft and aerospace engines, parts such as airfoils, disks and bearings have critical specifications for the desired amount and shape of chamfers and rounding on edges, whether to prevent crack propagation, or to ensure proper fit and seal. The difficulties in measuring these numerous callouts on an engineering drawing—ensuring a part is manufactured to specifications—begin with hard-to-reach access inside corners and between blades, and multiply when trying to align a measurement system in such a way as to ensure the sample is perpendicular to the adjoining edges. This gets even harder for rounded parts.

For engine parts makers, the short measurement-to-measurement time of 4D InSpec—about a second—means they can save hours over tedious rubber replica mixing, setting, and feature assessment.
4D Technology general manager Erik Novak, Ph.D., said, “The aerospace industry has some of the most stringent parts specifications found in any macro-scale manufacturing process, and their choosing of 4D InSpec validates the precision of our measurement and the great value added by its speed and versatility. Our customers will be able to measure the surface directly, or, using the fold-mirror accessories, to quantify edges and fillets in narrow spaces or on sidewalls, thanks to the large, 35 mm standoff of the 4D InSpec focal range.”
4D InSpec surface gauge’s chamfer and edge break analysis software was introduced using proprietary techniques in 2019. In addition to measuring machined edges, the device is used in aircraft maintenance assessing wear, scratches, dents, corrosion and other damage occurring in aircraft engine operation. Feature range is from 0.1 inch to 100 mils deep or tall. The measurements, completed in seconds on the shop floor or on-wing, quickly determine whether critical parts are either safe for use, or need to be discarded.
For more information: www.4dtechnology.com
Tags: 3d vina, 4D InSpec Selected for Automated Inspection of Edge Break on Aerospace Engine Parts, hiệu chuẩn, hiệu chuẩn thiết bị, máy đo 2d, máy đo 3d, máy đo cmm, sửa máy đo 2d, sửa máy đo 3d, sửa máy đo cmm
