For automotive manufacturers and suppliers, achieving a precise fit for body panels and their tools is often a time-intensive process involving plenty of trial and error. With the help of 3D measuring systems, automotive manufacturer Allgaier in Germany has managed to reduce measuring times in toolmaking, production, and assembly by up to 50 percent.
Over the past few years, the cars rolling off today‘s production lines have become significantly heavier. Larger dimensions, stronger engines, and modern features to improve safety and comfort have resulted in a substantial weight gain in recent years. As a result, some modern vehicles weigh over 500 kilos more than their predecessors in 1980. But extra weight means increased consumption and more carbon dioxide emissions. Even with energy-efficient new electric cars, lightweight construction plays an important role as every extra kilo reduces the car‘s range – which is not particularly generous in any case. So “less is more“ is particularly true for the development of e-cars. This is why car manufacturers and their suppliers are increasingly relying on the use of lightweight construction materials to reduce the weight of the vehicles, especially in the area of the car body.

Allgaier Automotive is an important partner for automotive manufacturers in this process. “The demands are constantly growing. For this reason, it is crucial that we continuously adapt our quality-related processes,“ comments Alpay Örscüoglu, Head of the Press Shop Business Unit at Allgaier Automotive.
The Allgaier Group is based in Uhingen, in southern Germany. Founded in 1906, the Group has been supplying pressed parts and tools since the 1920s. Nowadays, its operational activities are mainly focused on two business areas: Process Technology and Automotive. Allgaier Automotive is a system supplier to the international automotive industry and is a global leader in the field of sheet metal forming.
“The vital advantage that we have over our competitors is that we offer end-to-end processes from a single source, ”explains Klaus Wetzstein, Head of the Car Body Business Unit, “from development, planning, design, and validation right through to prototype construction and series production.”
The Demands Placed on Quality Control are Growing
Another characteristic of Allgaier Automotive highlighted by Örscüoglu is its great flexibility in reacting to markets’ ever increasing demands and further developing existing technologies and manufacturing methods, while simultaneously meeting the highest standards of quality. To safeguard quality, Allgaier has been using 3D measuring machines from GOM in toolmaking, pressed part production and assembly (one machine in each area) since August 2016. “Quality control has become a much more important part of our processes in recent years,” remarks Jürgen Straub, Head of Automotive’s Quality Management unit. “However, the traditional tactile measuring techniques have increasingly proved to be a bottleneck, which has caused considerable delays in some cases.”
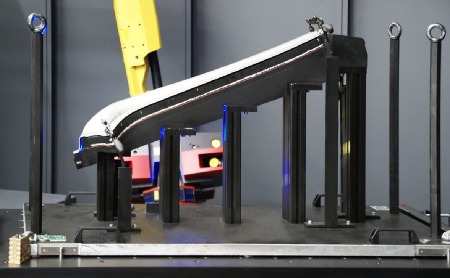
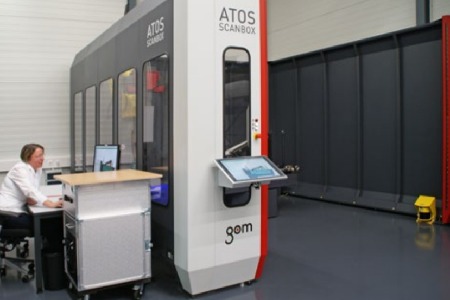
As Allgaier had been successfully using a manual 3D scanner from GOM in toolmaking for some years and therefore had a good idea of the advantages of optical measuring technology, the Group opted to invest in three additional automated 3D measuring machines in 2015: one for the measuring department to control the quality of pressed parts, one in production to measure assemblies, and another one for the production plant in Oelsnitz, Saxony. The machine chosen was the ATOS ScanBox 6130, which can even accommodate and measure large car body parts, thanks to its wide entryway. “We’ve already used it to measure side panels up to 3 m long with no problems,” comments Manuela Hausch, Manager in Measuring Technology, Press Shop and Car Body Component Production.
3D Measuring Machines for Toolmaking, Series Testing, and Assembly
 The ATOS ScanBox system’s core component is the ATOS Triple Scan optical 3D scanner. The scanner uses fringe projection procedures rather than individual measuring points to optically measure a component’s entire surface geometry based on a high-resolution point cloud. The fringe pattern is recorded by two cameras. A highly-detailed image consisting of millions of measuring points can be recorded within a few seconds and without physical contact. The GOM software computes three dimensional object coordinates for each camera pixel. The computed polygon mesh describes freeform surfaces and geometrical elements, which can be compared with the drawing or directly against the CAD data set in a shape and dimension analysis. Special algorithms also enable edges to be measured with subpixel accuracy. This concept facilitates the inspection of complete surfaces, hole positions, trimming and spring, tornado lines, gap size, and offset, as well as other typical characteristics of sheet metal forming.
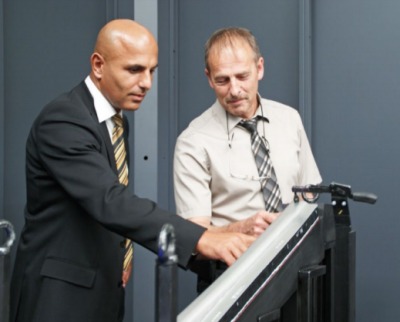
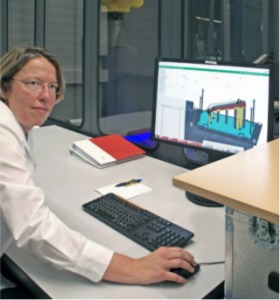
“Thanks to full-field measurement, the entire car body part can be scanned very quickly compared with tactile measurement technology, and without any blind spots,” explains Hausch. “Another, really significant advantage over the tactile measurement protocols are the color plots. The color coding makes it very quick and easy to spot problem areas, so our tool makers can see at a glance where they need to make a few tweaks.” Örscüoglu adds that: “With optical measurement, we now have the advantage of getting a result very quickly, so we can promptly intervene in the manufacturing process, whether we’re dealing with a tool, a pressed part, or an assembly part.”
Allgaier uses the GOM scanners along its entire value chain. Firstly, the tools are designed in CATIA V5. They are then milled, assembled, measured using the ATOS system, corrected, and then finally sent to try-out. “This is where the first sheet metal part is pressed on them, and this test part is measured in the GOM cell,” explains Klaus Wetzstein, Head of the Car Body Business Unit. “The first test part generally always deviates in certain ways from the null geometry when it comes out of the press.”
Faster Tool Release due to Full-Field Measuring Results

This is because sheet metal that has been drawn and pressed springs back or becomes distorted and thus has measurements that differ from the tool. When it comes to spring-back compensation, the tool must therefore be designed with great experience so that it doesn’t match the dimensions of the component data set, but instead compensates for the behavior of the sheet metal part and the process influences during forming. “It’s a mixture of experience and feeling your way – something that we have to re-run with each component,” explains Straub. “The way the sheet metal behaves depends on many factors, including the material, material thickness, degree of deformation, bending radii, etc. Even the best designer couldn’t design a tool that would fit perfectly the first-time round.” A full-field measurement of the component is therefore performed, and based on this result, corrections to the tool are carried out and the simulation is adjusted. This is repeated until the component emerging from the tool is close to the null geometry.
These loops are then also repeated on the press and then again with the assembly part. Wetzstein: “The first parts leave the body shop cell and then go off to be measured. We can see from this measuring result of the pre-series parts whether the part is fit for series production. If the answer is yes, the series is released. If the answer is no, the press or the body shop cell is readjusted and it is measured again. With the ATOS ScanBox this is a relatively fast
process – which is a clear bonus for us, of course. Measurements are also taken during series production according to the inspection plan, at intervals specified by the customer.”
High Measuring Speed Optimizes Series Testing
Some customers stipulate three parts per pressing, others require five or even more. “But thanks to the speed of the automated GOM system, this isn’t a problem anymore,” says Hausch. “For example, we’ve just measured a hood with a time saving of 50 percent compared with tactile measuring: Instead of taking two hours to measure the part, we were done in 45 minutes. And that’s a sheet metal part measuring 1.60 m by 1.50 m. What’s more, the measuring reports of the scanning system are much more informative than a tactile measurement protocol.”
The entire measuring and inspection process runs automatically right through to the inspection report. The measuring machine’s Auto Teaching function makes programming the measuring sequence easier, for example. If the inspection plan has been saved as a template in the system, it can easily be played back again at the press of a button. The measurement analysis is then generated in the required format, e. g. as a table or a color plot showing the deviation from the CAD.
Expressiveness of the Graphic Measuring Results Accelerates the Entire Manufacturing Process
 And Wetzstein goes into even more detail: “Thanks to the color plot representation, we can clearly identify in the commissioning phase, for example, how the component is bending out of shape.” So the start-up manager in the body shop cell can immediately take action, remeasure and readjust everything until he reaches the target. The Head of the Car Body Business Unit adds that: “With the GOM system, deviations can be seen in an instant based on the colors, whereas we used to have to spend hours evaluating and comparing measuring points on a tactile machine. This is a quantum leap for us in assembly.”
Örscüoglu is extremely satisfied with the GOM systems too: “Now, we will detect and counteract deviations considerably faster – whether in the tool, pressed part, or assembly part. This will considerably speed up our entire process, from the design stage to the completed assembly part.”
For more information: www,gom.com
Tags: 3D Measuring System Speeds Automotive Inspection, 3d vina, hiệu chuẩn, hiệu chuẩn thiết bị, máy đo 2d, máy đo 3d, máy đo cmm, sửa máy đo 2d, sửa máy đo 3d, sửa máy đo cmm
