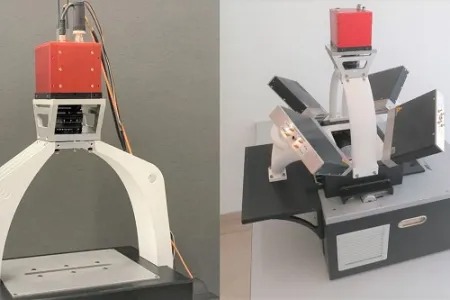
Xposure:Photometry, developed by the Austrian Institute of Technology (AIT), is a fast inline 3D surface scanner realised by a high-speed smart camera. It is designed for optical inline surface inspection tasks common in many industrial manufacturing processes.
Conventional 2D scanning methods cannot distinguish between pseudo defects – dirt on the surface of the manufactured part, for instance – and actual 3D defects such as scratches, ridges, spikes, pinholes or wrinkles. At the same time, existing 3D inspection methods are not able to handle high speeds, neither for single objects nor for high transport speeds of endless material.
 Xposure:Photometry addresses this by combining very fast photometric stereo (PS) imaging and smart camera technology to highlight inline, actual small 3D defects on the object’s surface, while distinguishing them from pseudo defects.
Photometric stereo imaging is known as a shape-from-shading method for reconstructing the 3D object shape from planar images taken from multiple illumination directions. It is sensitive to small deviations of the object surface structure, derived as local changes of the surface local normal vector. Photometric stereo processing inherently computes different images of the object’s surface structure under different illumination directions, which highlights small 3D surface defects.
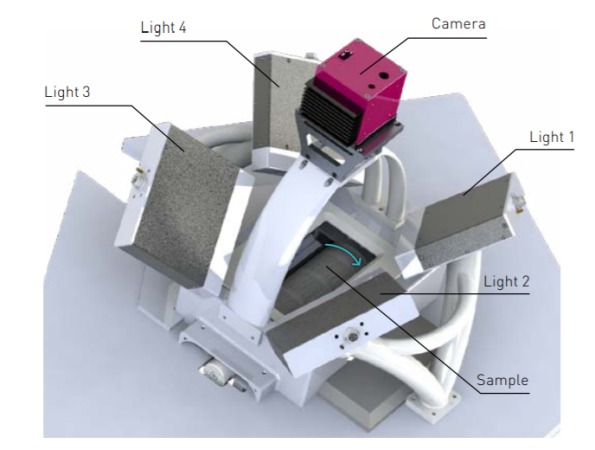
To illuminate the object, AIT typically uses a set of four fast-strobed line light sources. Xposure:Photometry can be combined with AIT’s Xposure:Flash line light sources, but is also compatible with a large variety of fast-strobed off-the-shelf line lights.

AIT’s multi-line-scan camera, Xposure:Camera, is mounted above the inspected object’s surface. The camera acquires every point of the object’s surface four times, for the four different illumination directions. An FPGA in the camera calculates an albedo image (conventional 2D image of the surface) and a gradient image representing the surface normal vector at each acquired surface point.
The output of the FPGA can directly be used for inline 3D surface inspection. Furthermore, the processing can serve as a pre-processing step to supply classical or AI-based object classifiers with rich photometric stereo data of the objects’ surface, in order to make the classifiers more discriminative.
Xposure:Photometry combines 2D high-speed capture with on-camera 3D surface capture, which, to AIT’s knowledge, is currently not on the market. When 1D surface gradients are enough, the system can reach 300kHz acquisition speed using two light directions. When full 2D surface gradients are required, 200kHz is reached using three light directions. Finally, when targeting optimal, 3D information of the surface structure, the system can run at 150kHz using four light directions.
In its high-precision configuration, Xposure:Photometry delivers lines with 2,048 pixels width at a line rate of 150kHz, and with a 300kHz line rate for a lower precision configuration.
Potential applications include: wire inspection, where material defects on the surface of wires can be identified as they are drawn at speeds of 100m/s; print inspection and inspecting battery electrodes, which are made of a very dark material – Xposure:Photometry is sensitive to differences in greyscale value and therefore able to detect defects like scratches and pinholes fast on dark surfaces.
Xposure:Photometry was shortlisted at the Vision Awards which took place during the recent VISION 2021 exhibition in Stuttgart, Germany.
For more information: www.ait.ac.at
Tags: 3d vina, hiệu chuẩn, hiệu chuẩn thiết bị, máy đo 2d, máy đo 3d, máy đo cmm, sửa máy đo 2d, sửa máy đo 3d, sửa máy đo cmm, Xposure Photometry Offers Fast Inline 3D Surface Scanning
